How to manage Velocity rules?
The Velocity Check feature allows you to create and manage rules for transaction monitoring in the E-commerce Portal.
With Velocity Check, you can:
- View registered rules;
- Create new rules;
- Edit existing rules;
- Delete rules;
- Enable or disable rules.
How to view the list of registered rules
- Access the Portal E-commerce

- Click the Gestão de Risco menu and then Velocity Check

- On the displayed screen, you will find the Regras cadastradas card. Click Ver mais to view all configured rules, if any:

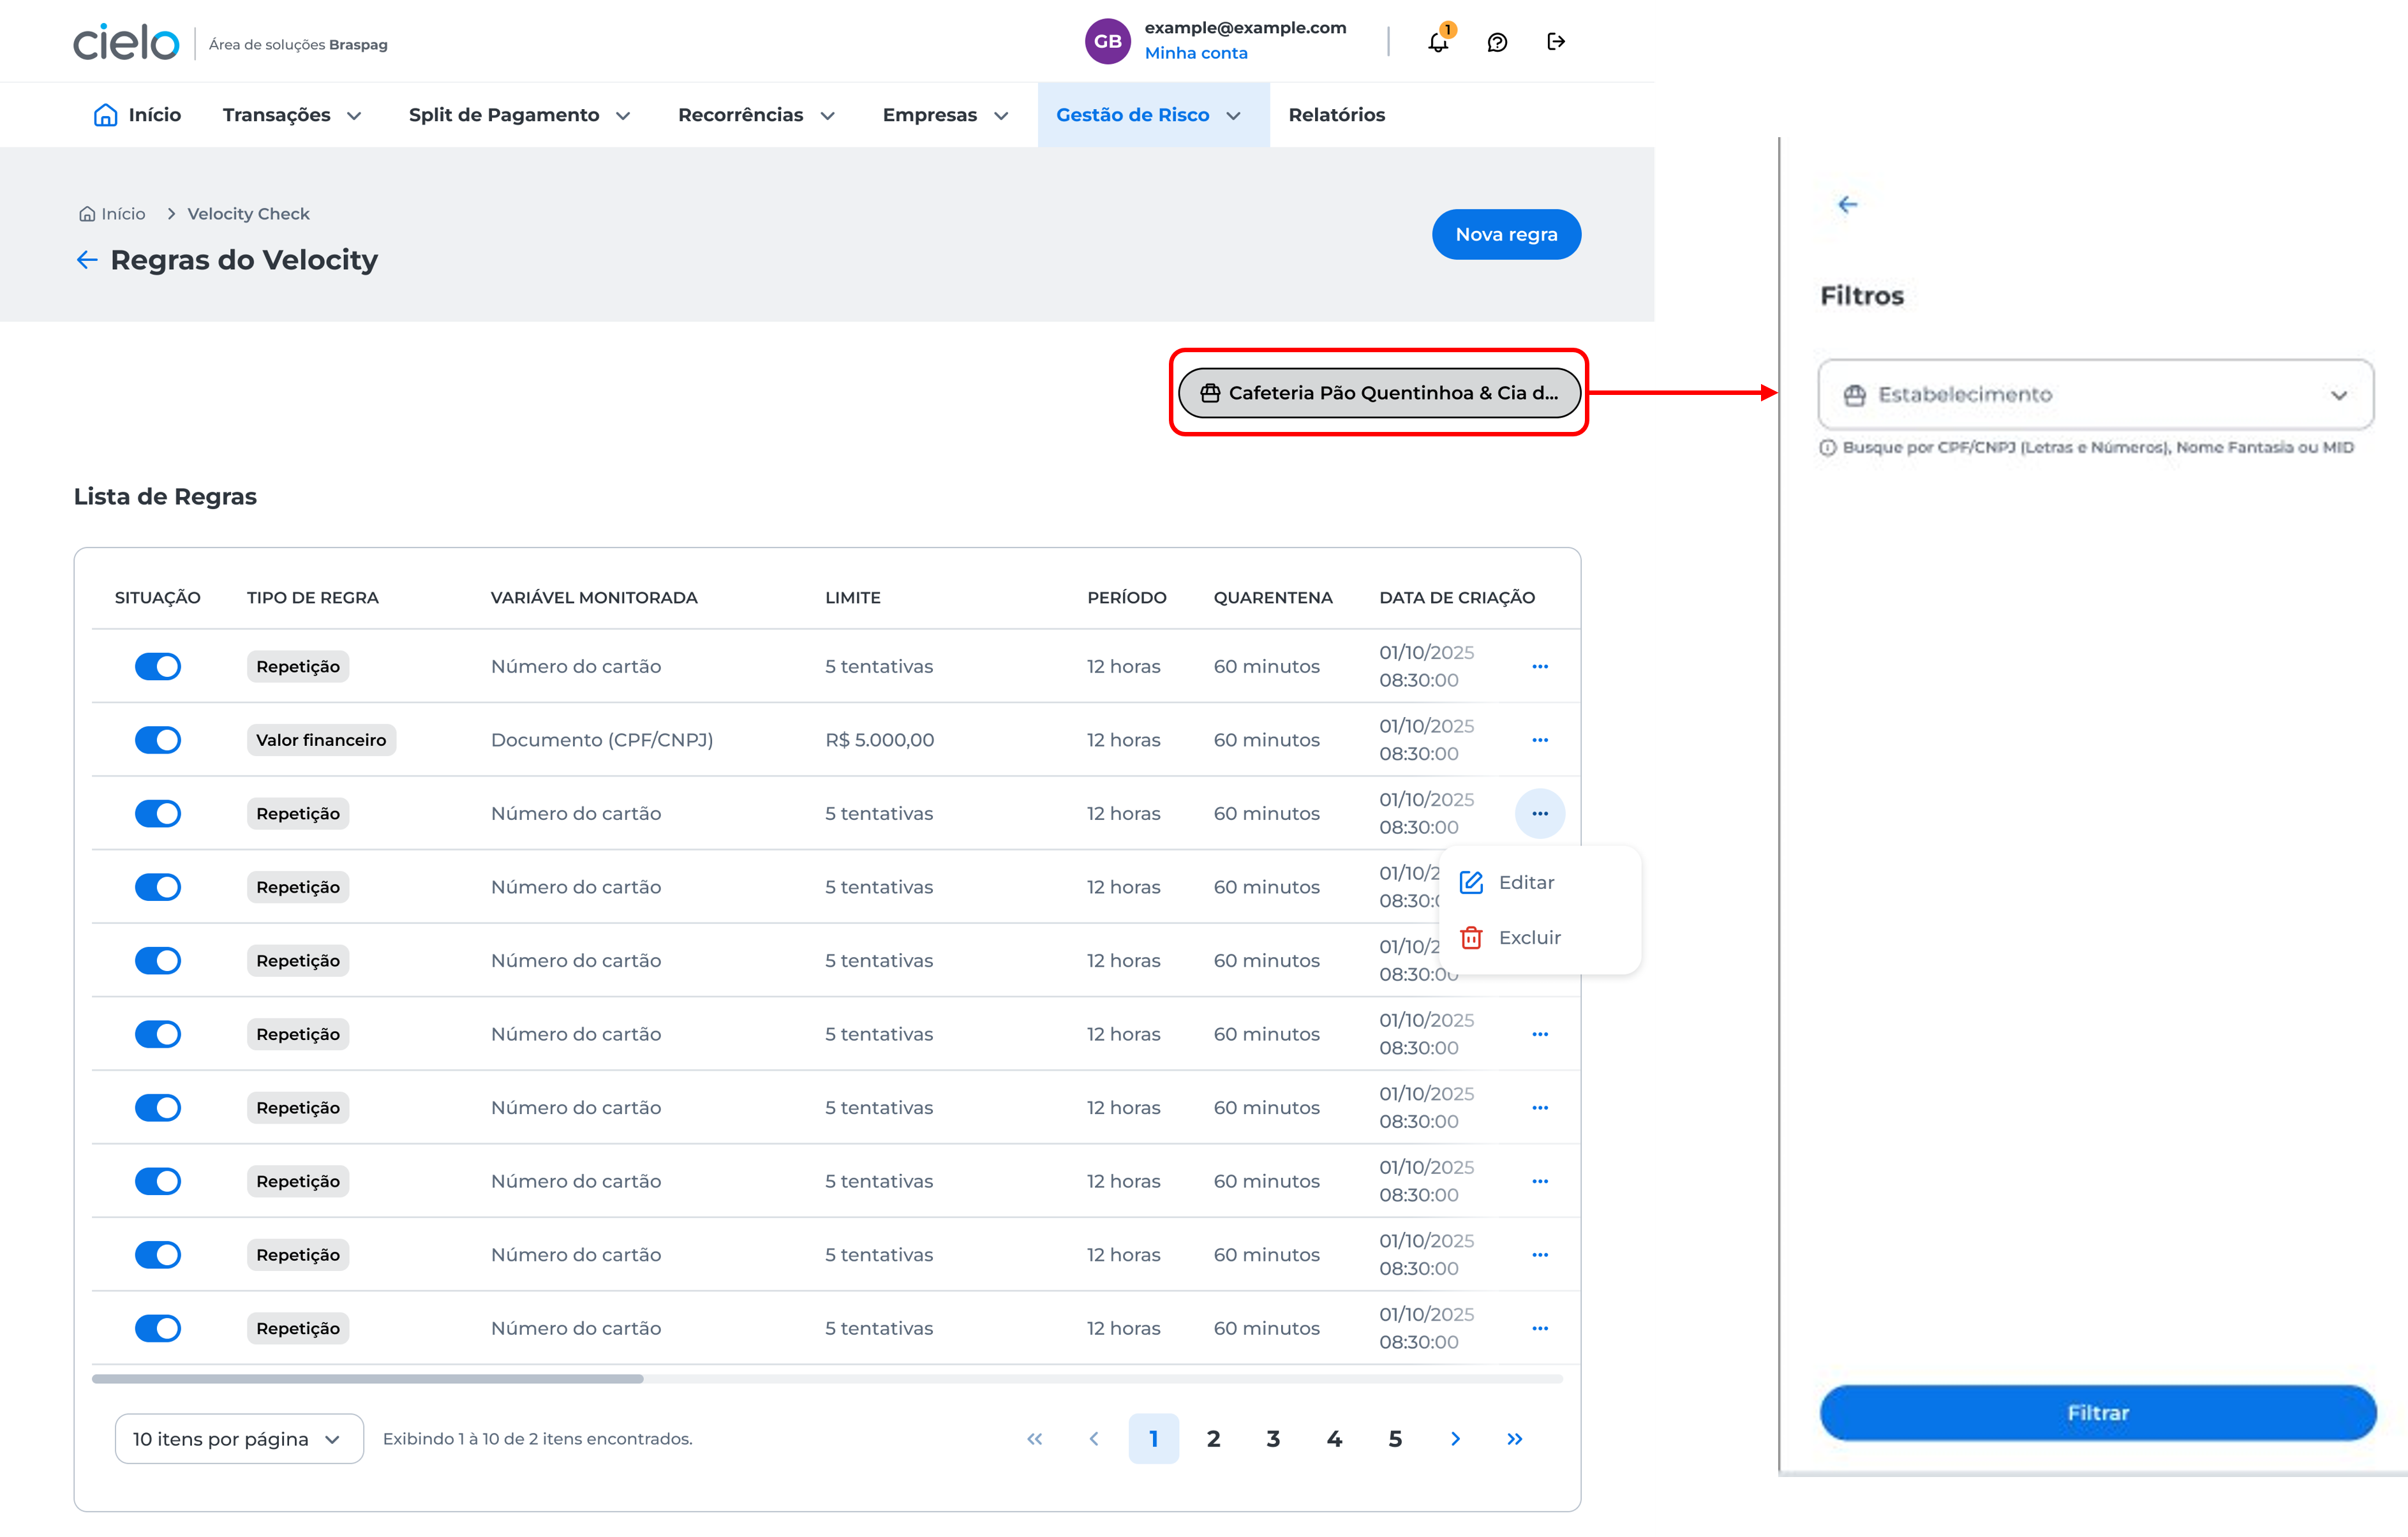
- The lista de regras will be displayed. You can use the filter and select the merchant you want to view:
How to create new rules?
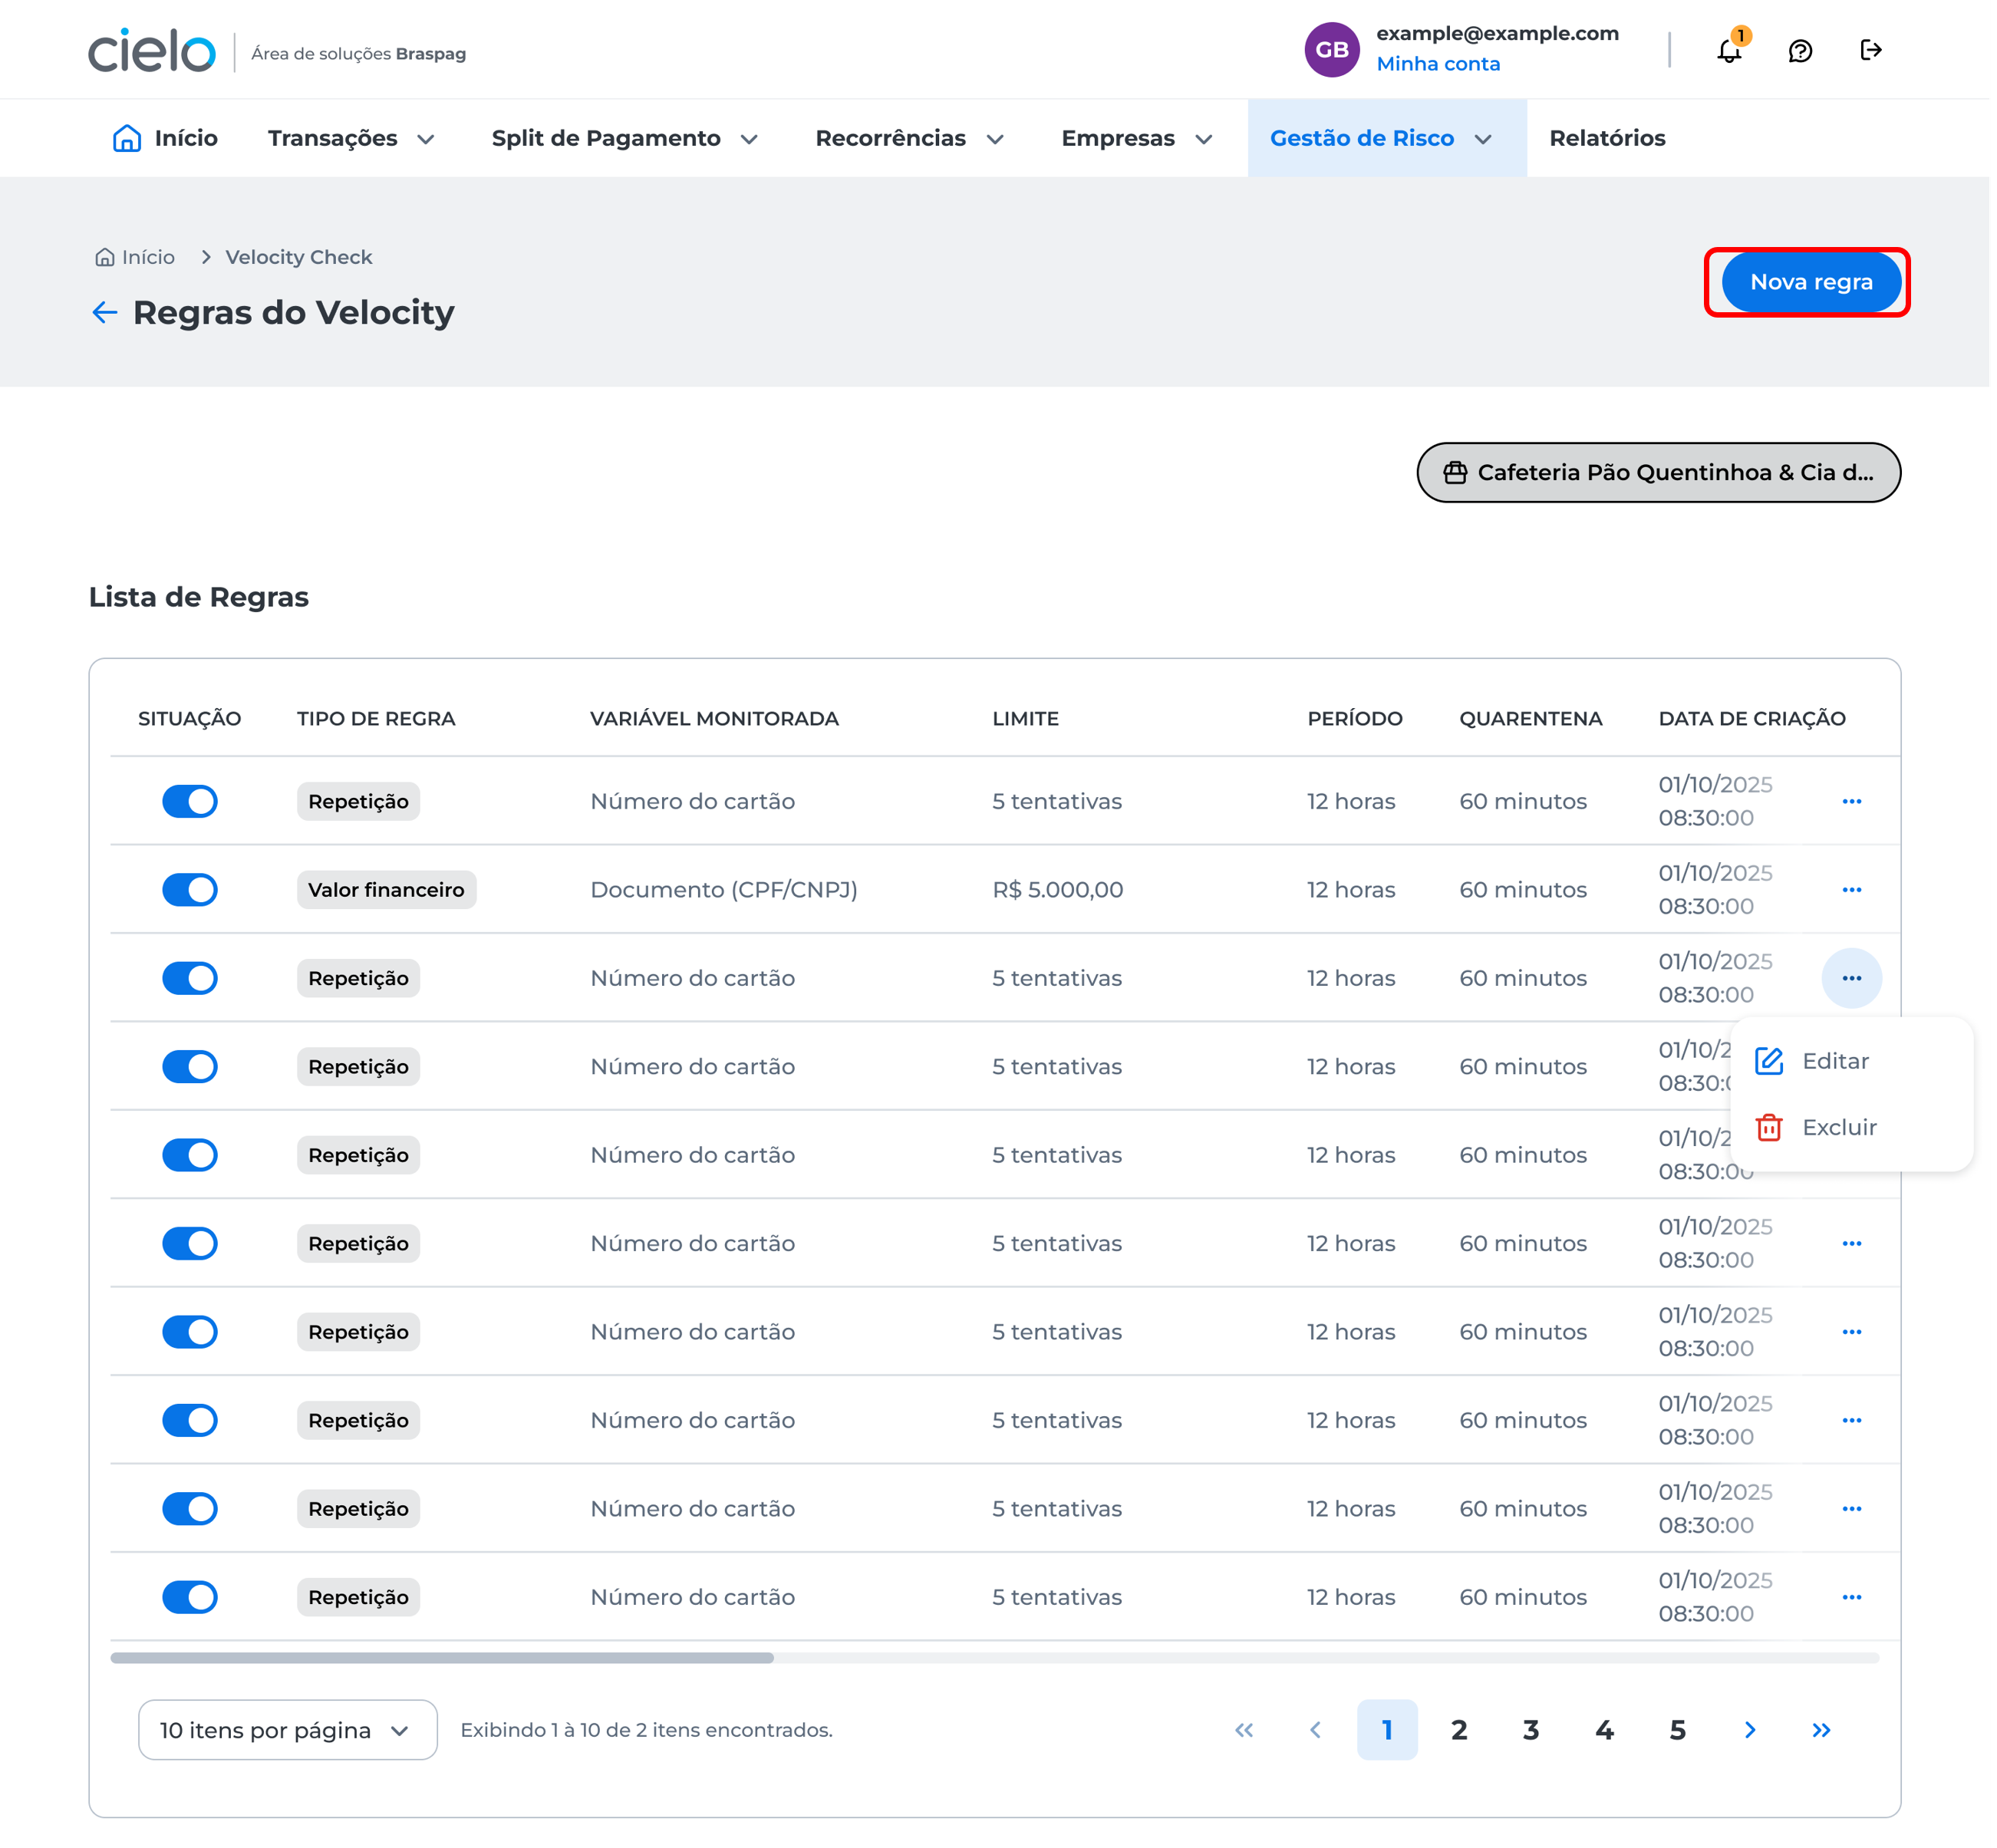
In the lista de regras, click Nova regra:
Choose the merchant, the variable to be monitored, the tipo de monitoramento, and click Continuar:

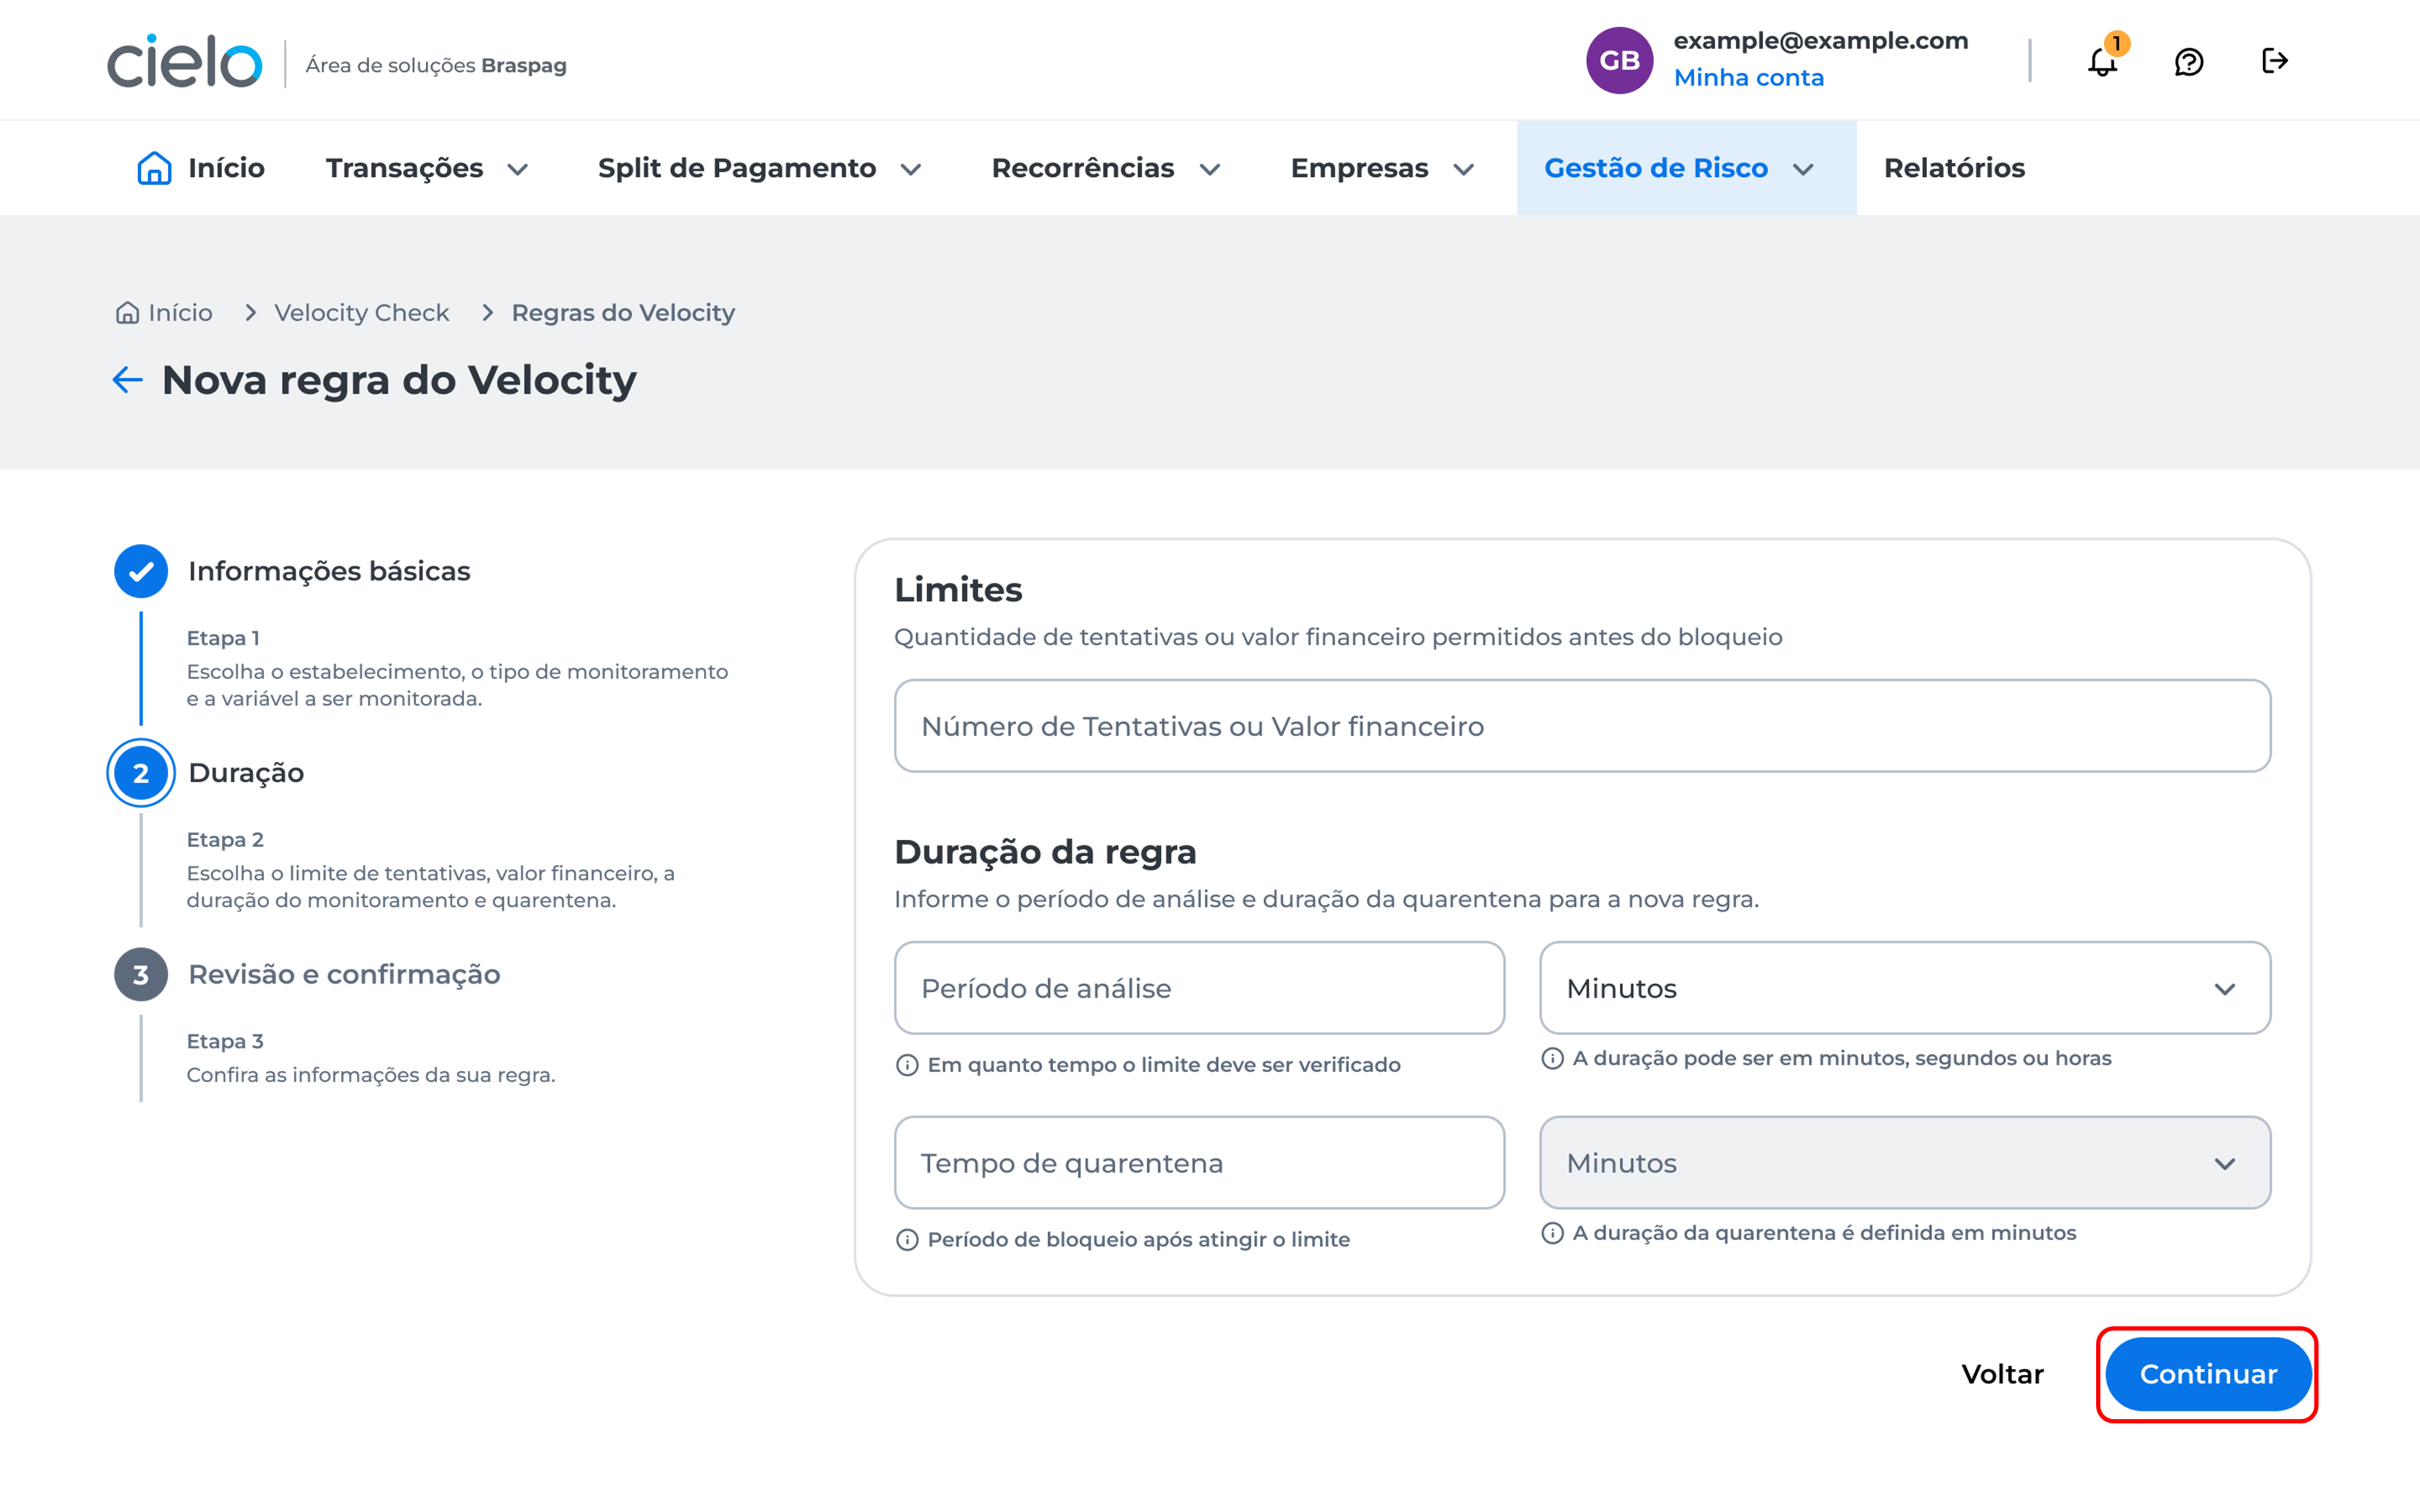
Choose the limits related to the monitoring type selected in the previous step, the duração da regra, and click Continuar:
Review the created rule and click + Add rule to include a new one, or Continuar to proceed:
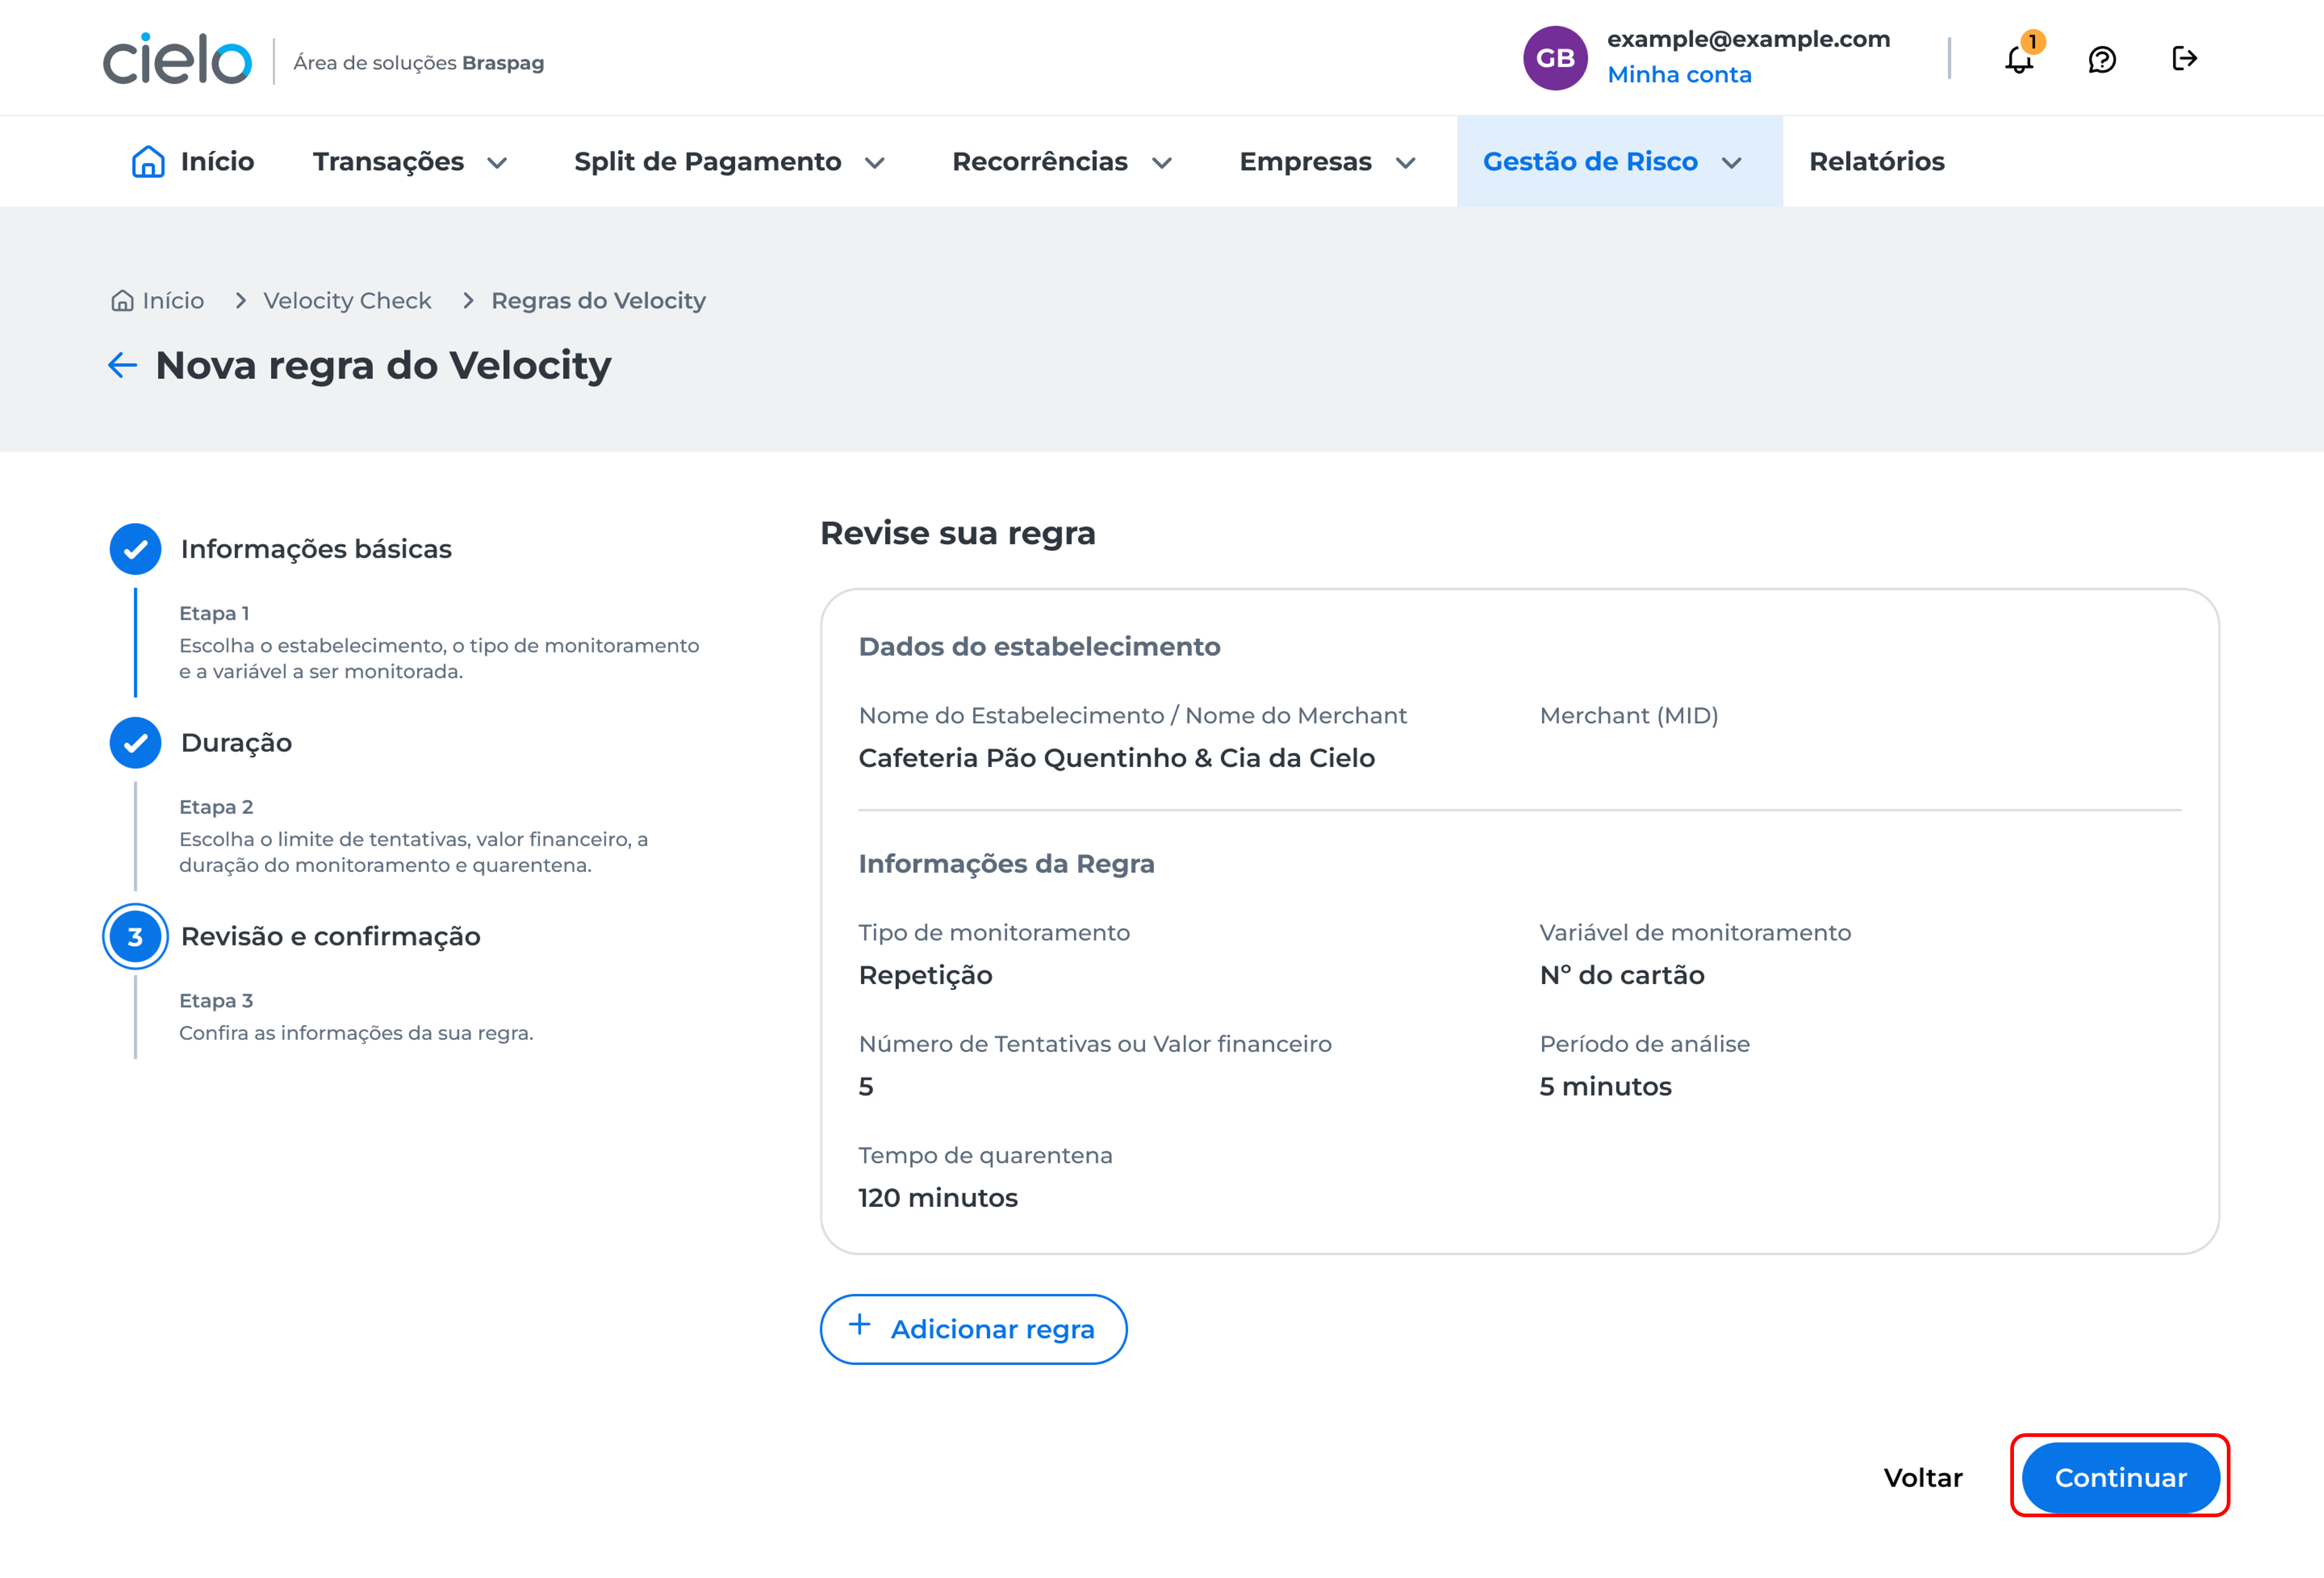
In the example above, the rule states that there is a limit of five repetitions per card number in 5 minutes, with a 120-minute quarantine. In this case, there will be a block with code
BP171for all transactions made after the five allowed attempts within that time for the same card.
You will be directed to the two-step authentication screen. Learn more about this process in the article: How to register two-step authentication? After completing two-step authentication, a confirmation window will be displayed informing that the new rule was successfully created for the merchant.
How to edit rules
In the lista de regras, click the icon next to the rule you want to change to display the Editar button:
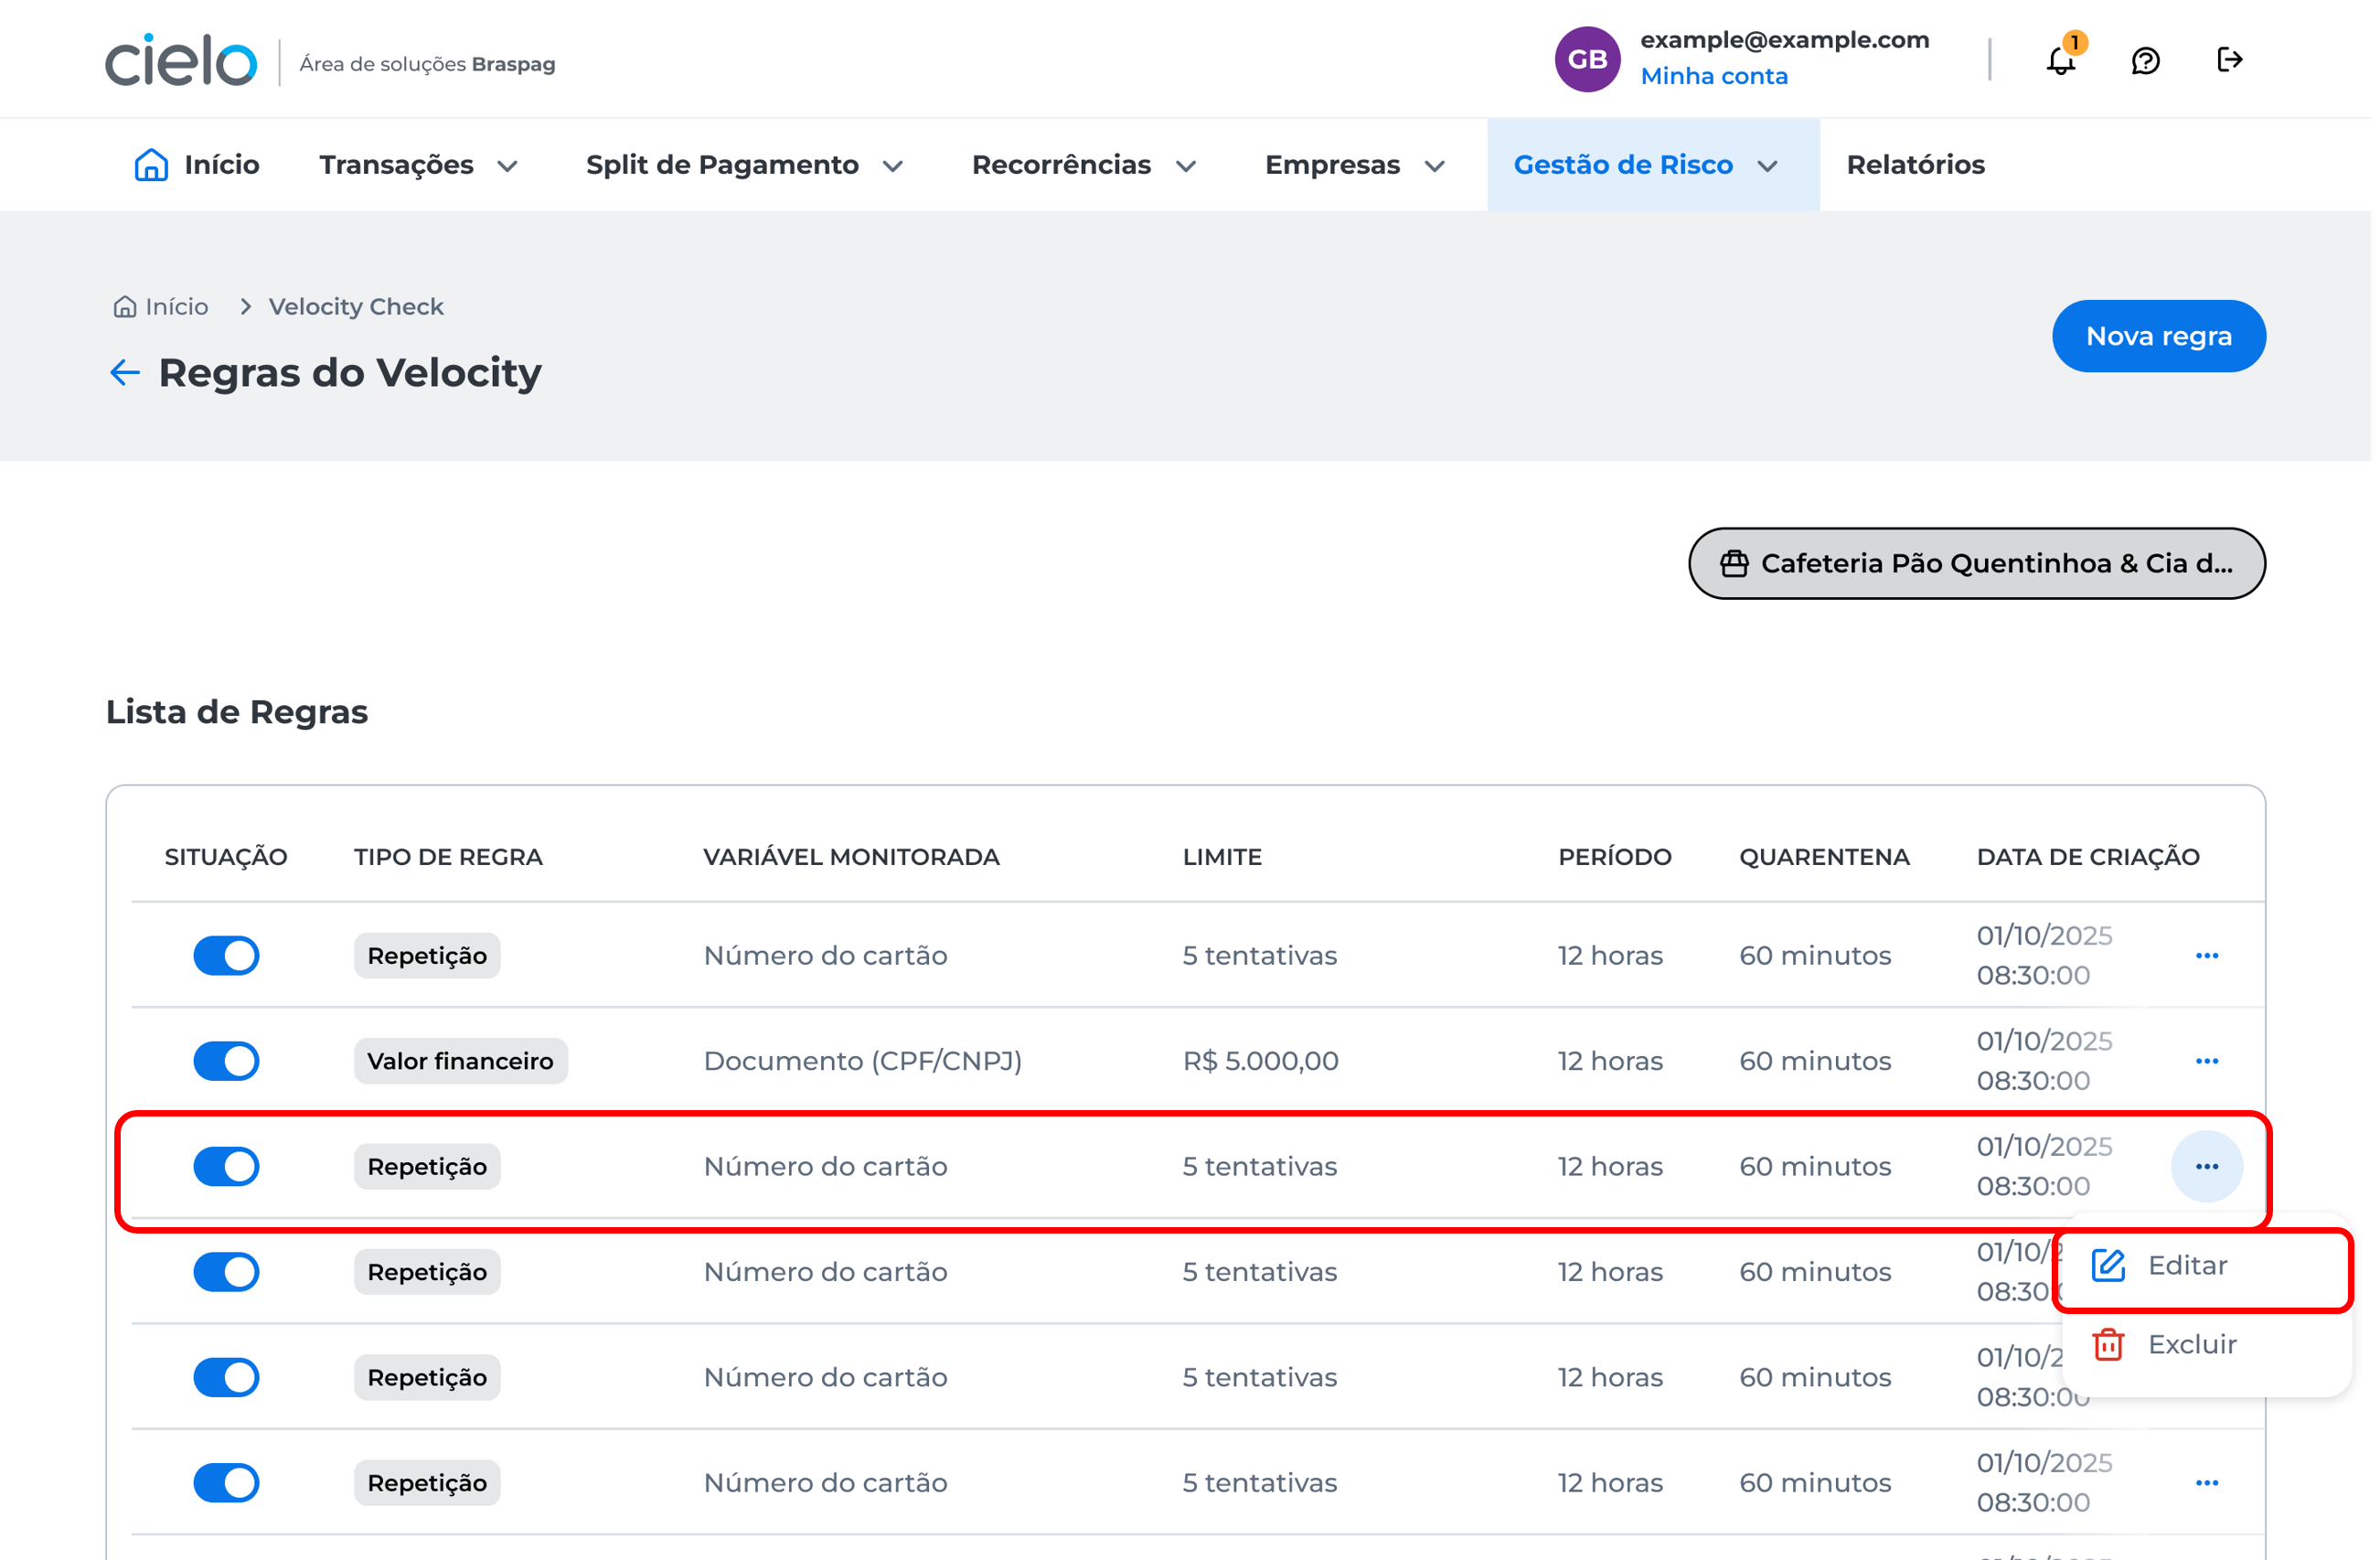
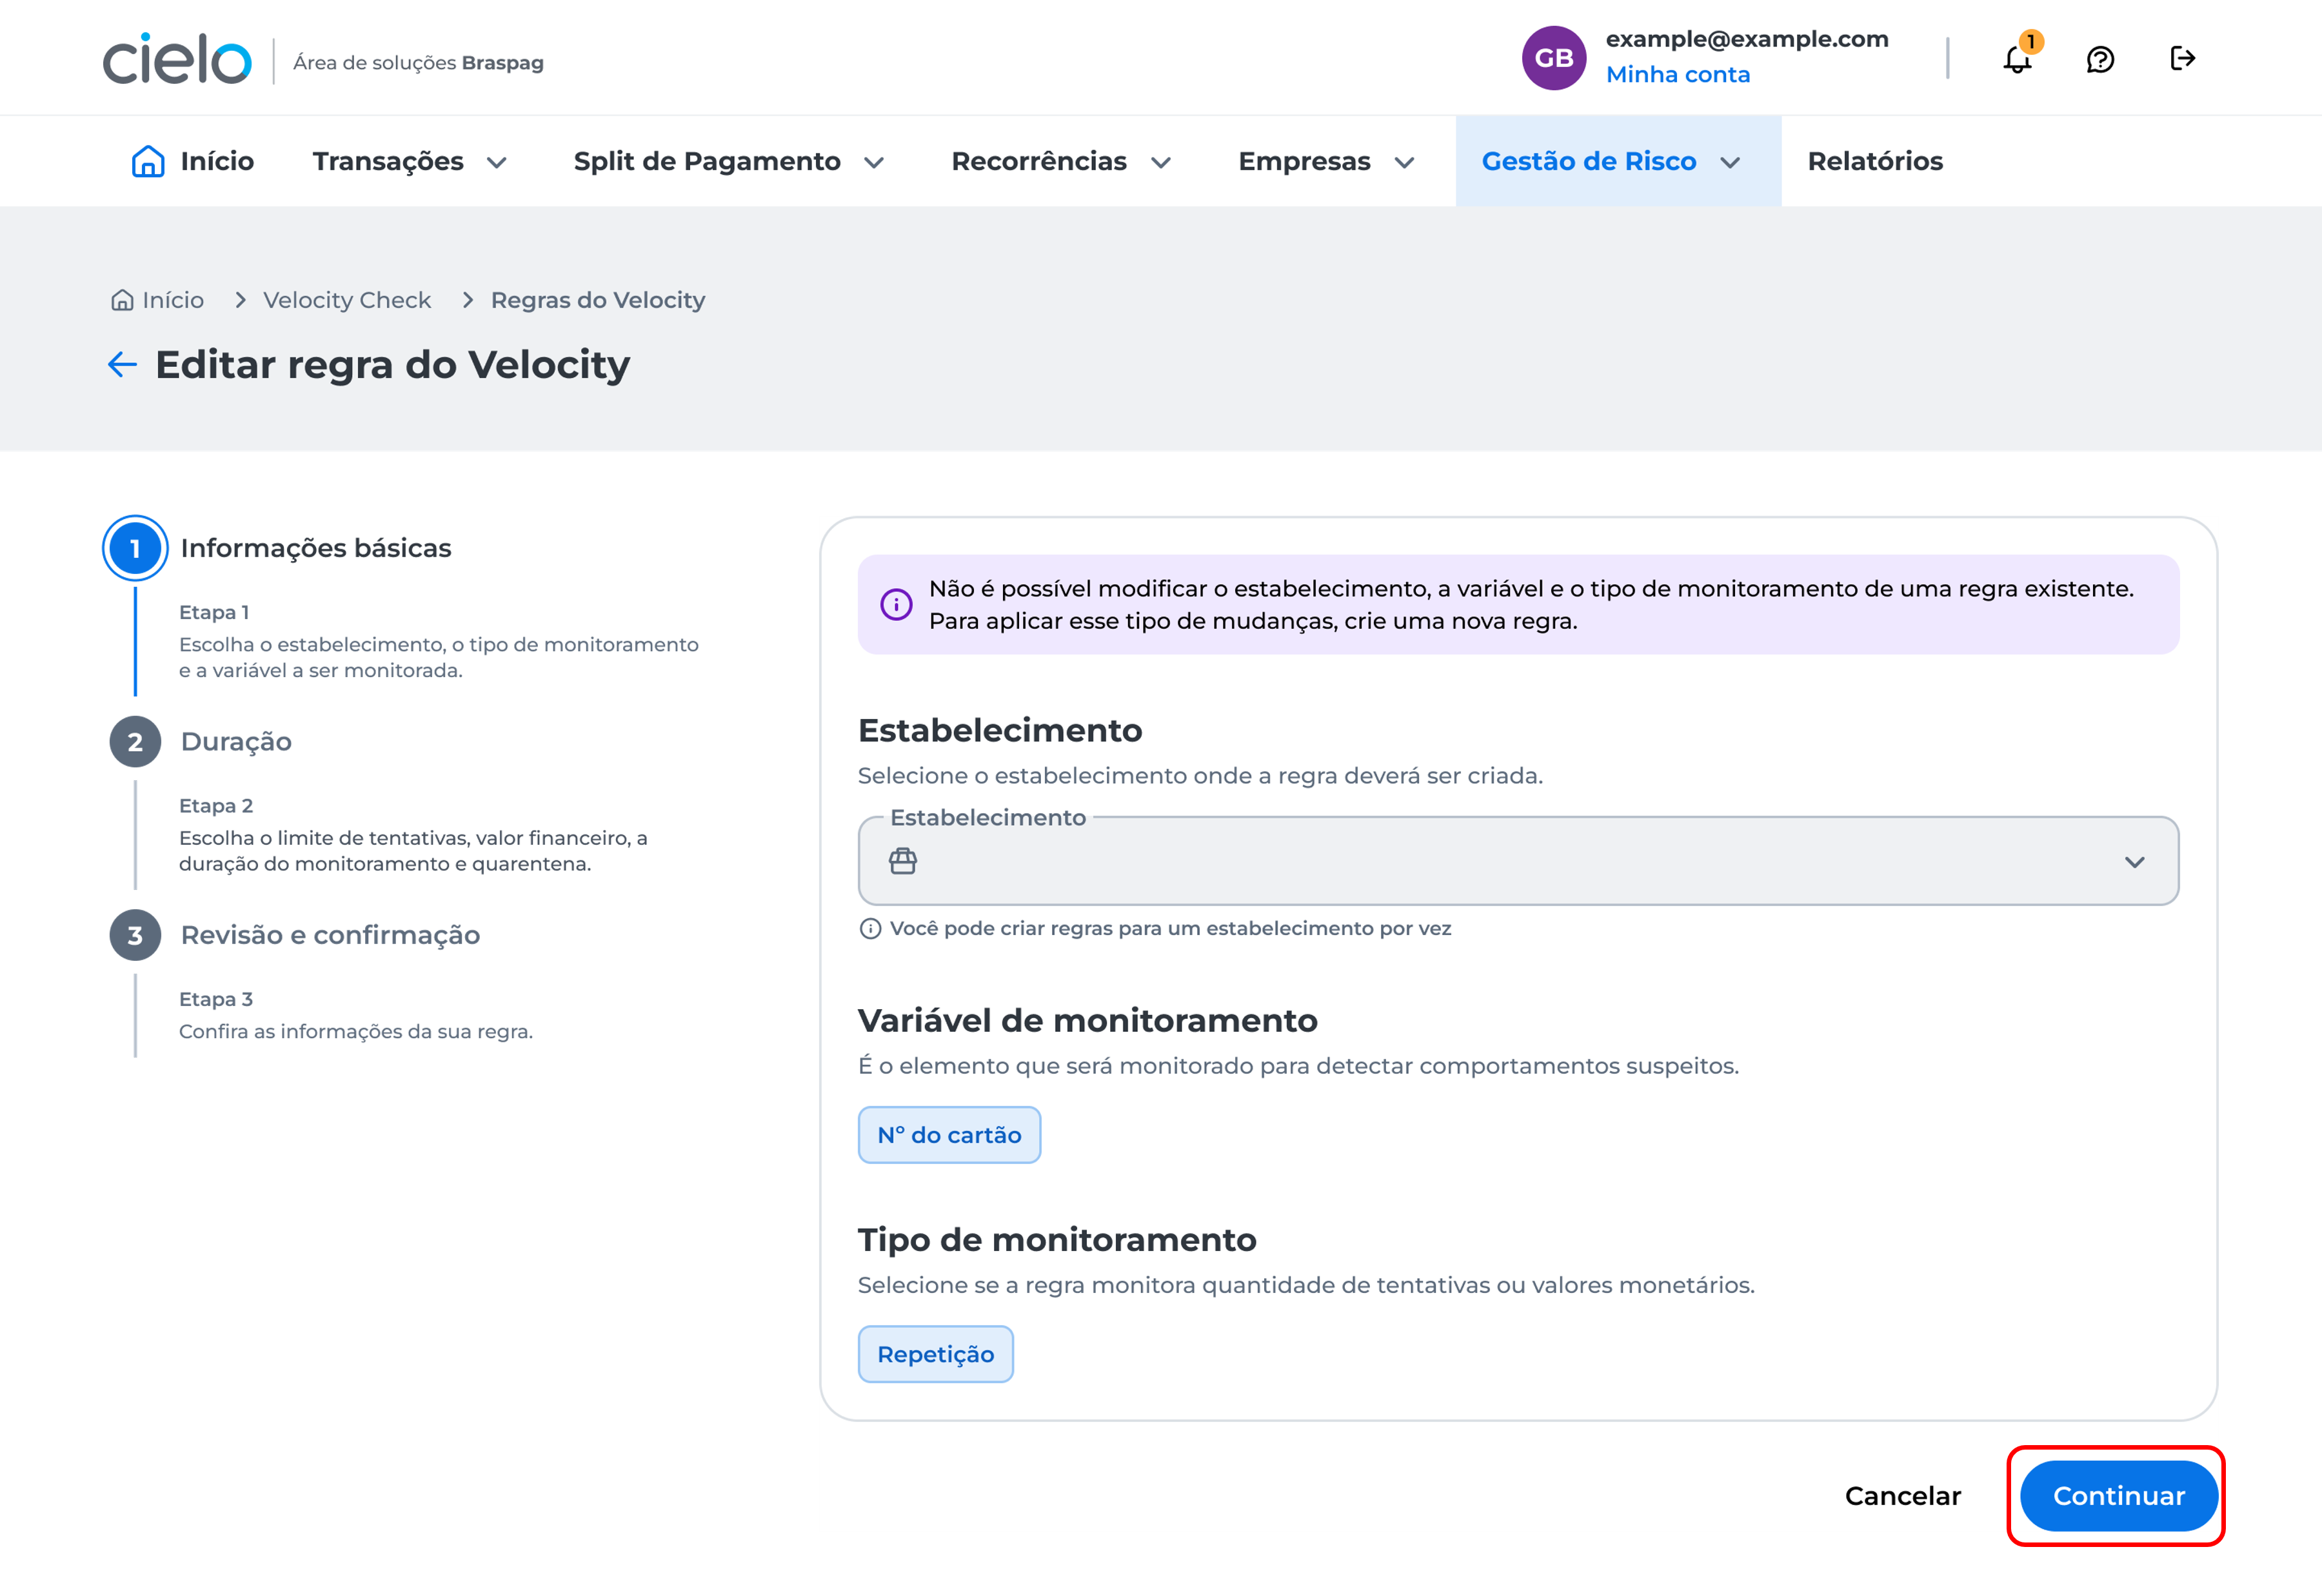
It is not possible to edit the basic information of the merchant, variable, and monitoring type. For this type of change, you need to create a new rule.
Click Continuar:
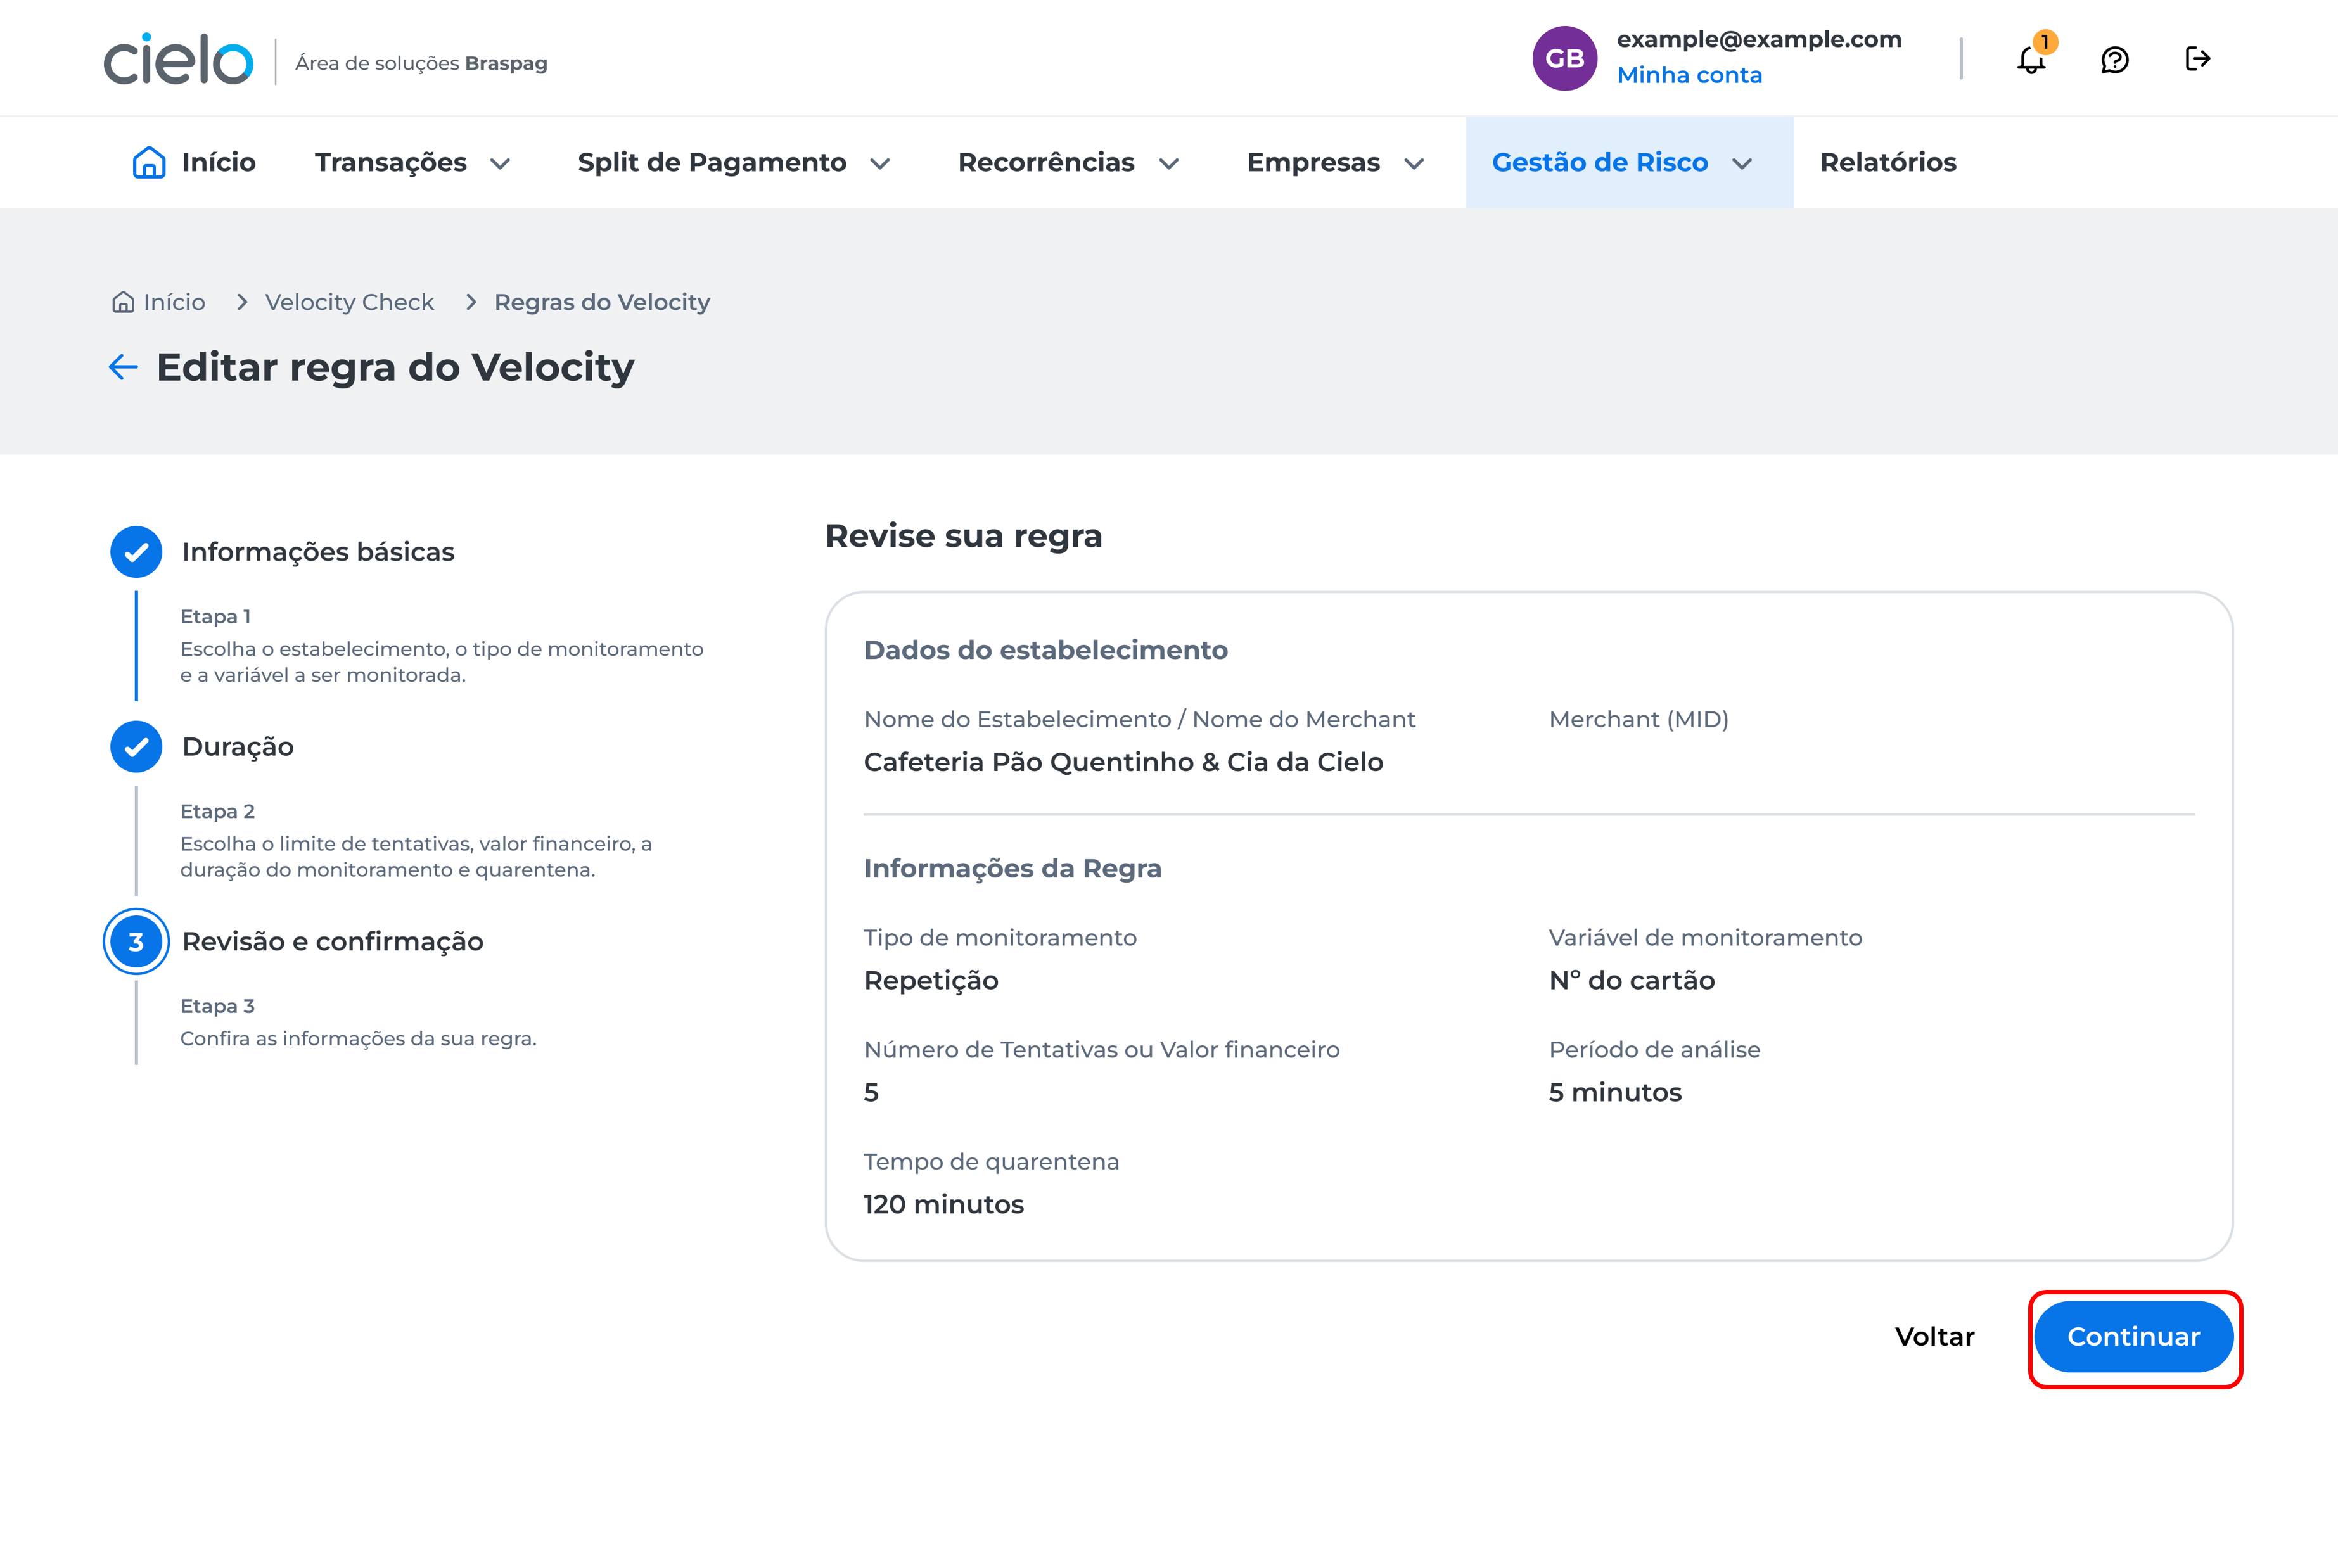
Make edits to the limites or duração da regra and click Continuar:

Review the rule edits and click Continuar:
You will be directed to the two-step authentication screen. Learn more about this process in the article: How to register two-step authentication? After completing two-step authentication, a confirmation window will be displayed informing that the new rule was successfully created for the merchant.
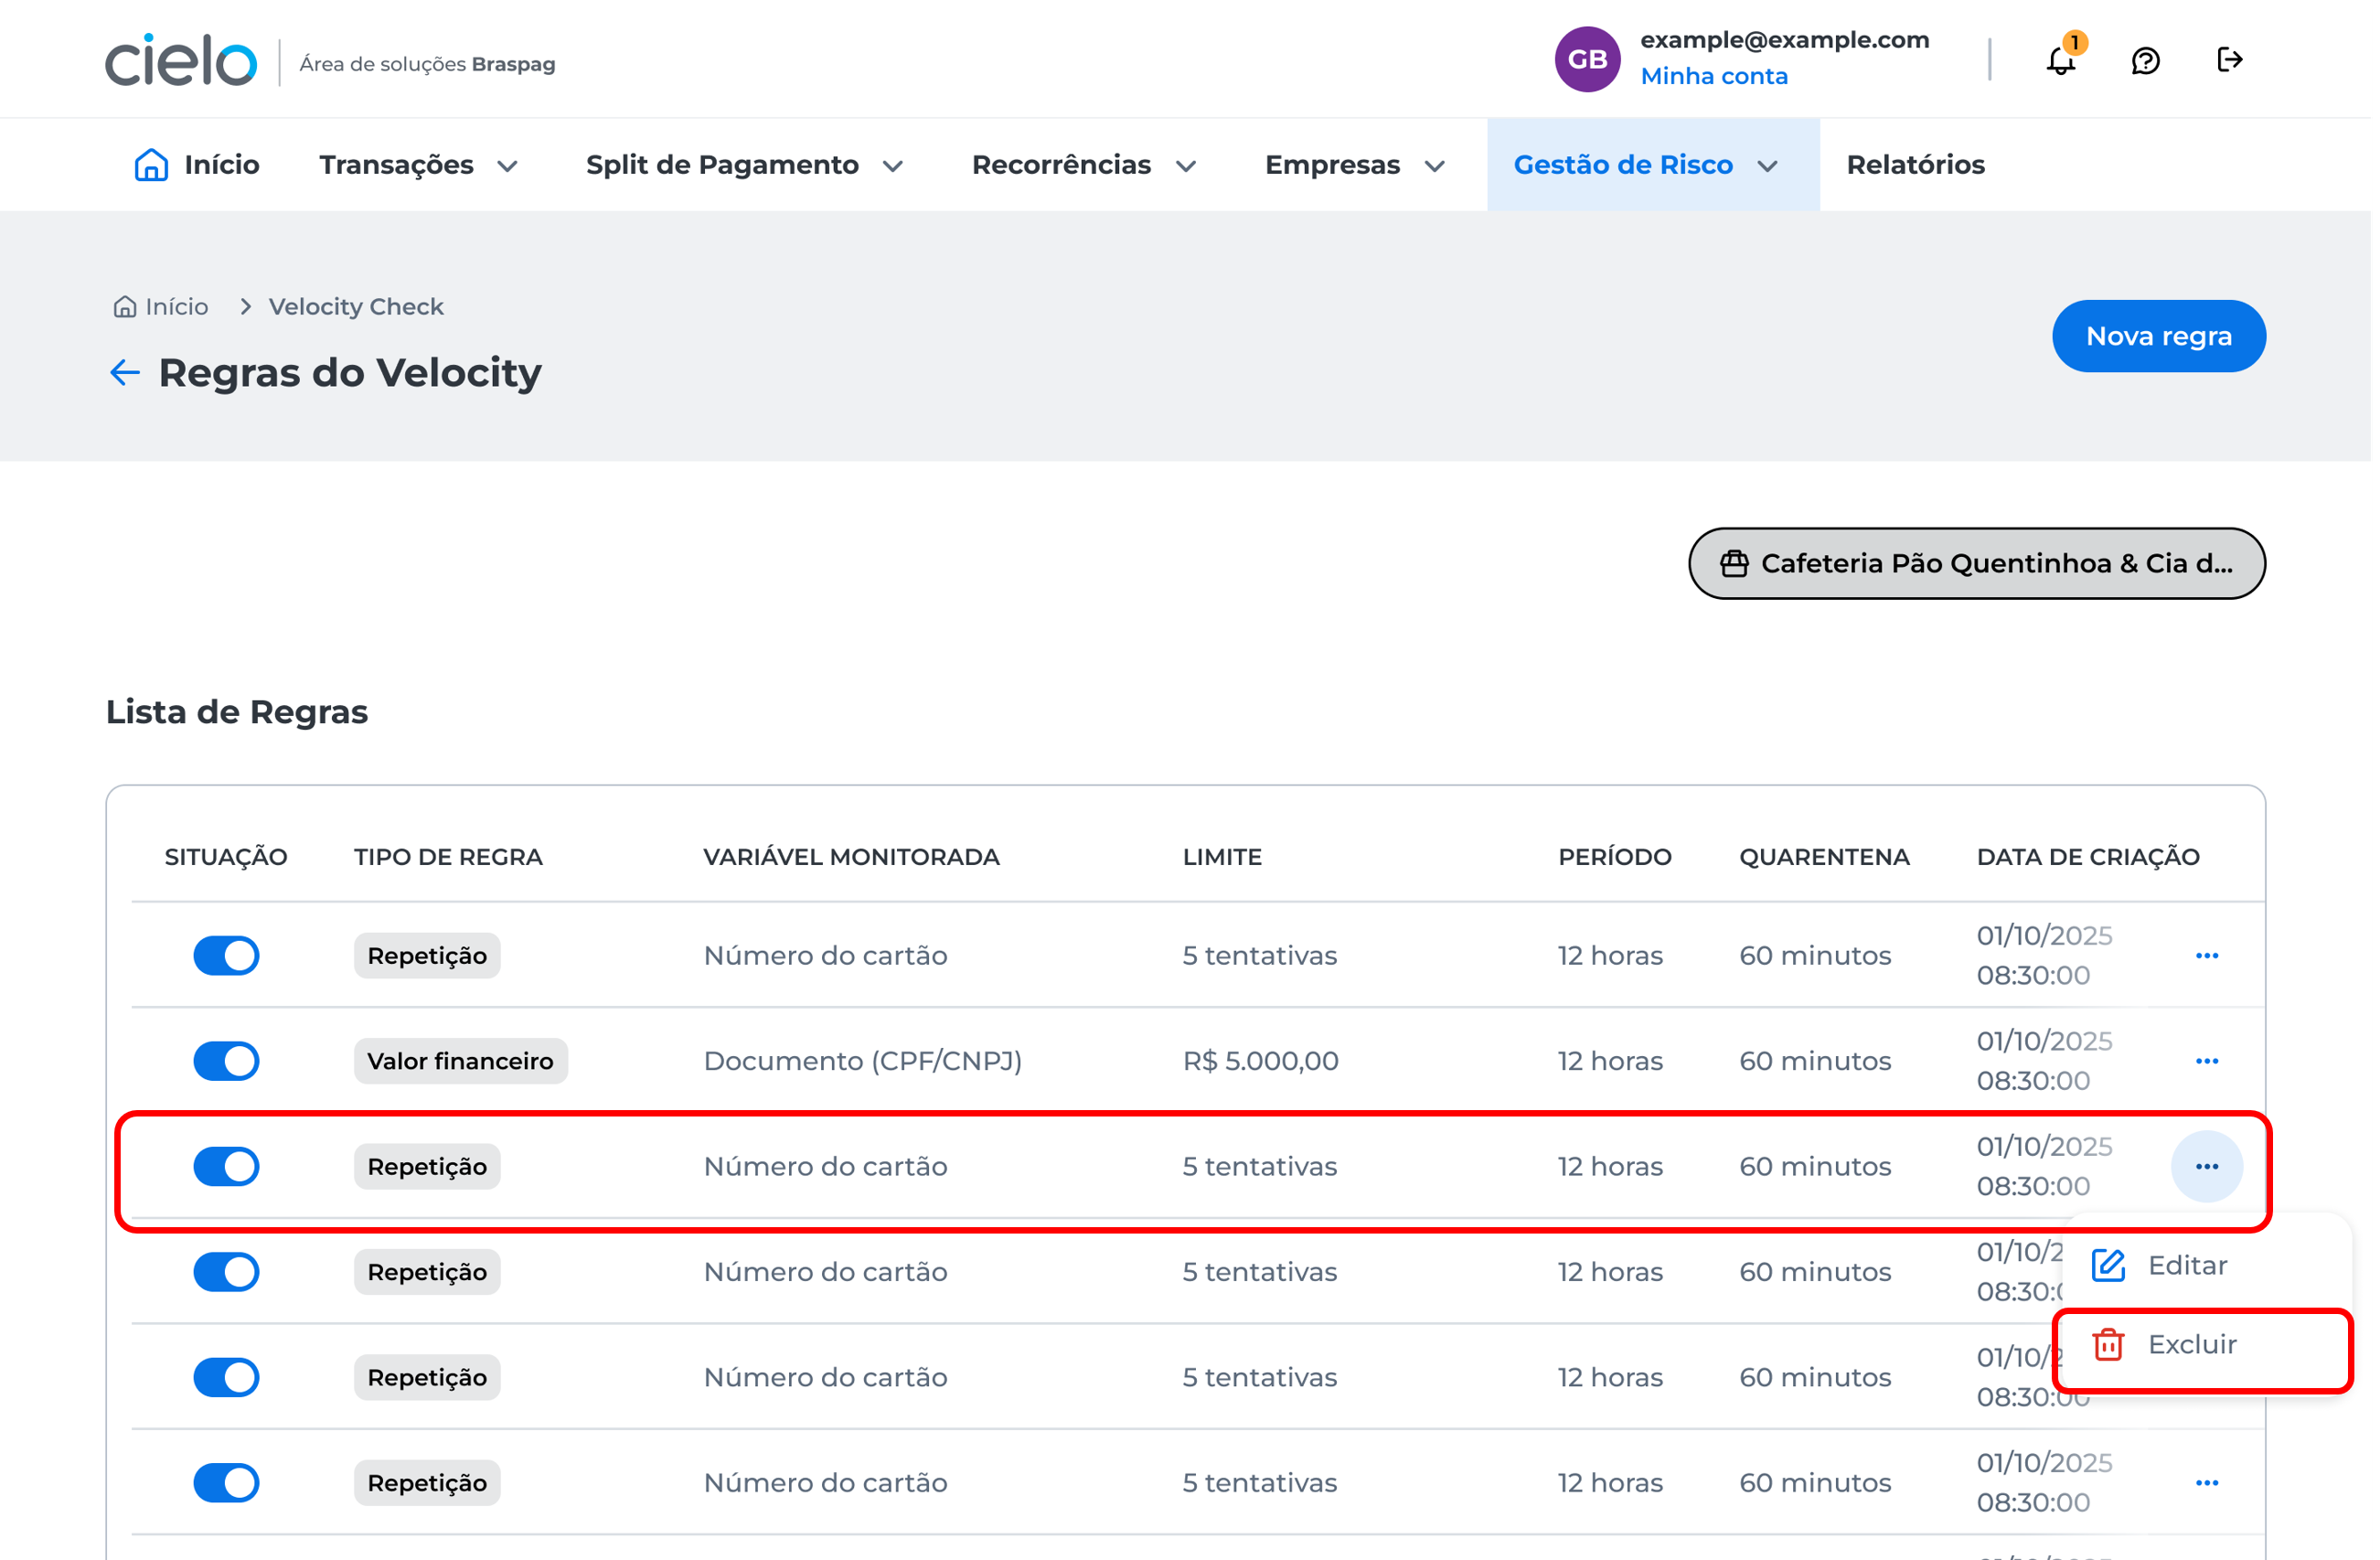
How to delete rules
In the lista de regras, click the icon next to the rule you want to delete to display the Excluir button:
You will be directed to the two-step authentication screen. Learn more about this process in the article: How to register two-step authentication? After completing two-step authentication, a confirmation window will be displayed informing that the new rule was successfully created for the merchant.
How to enable or disable rules
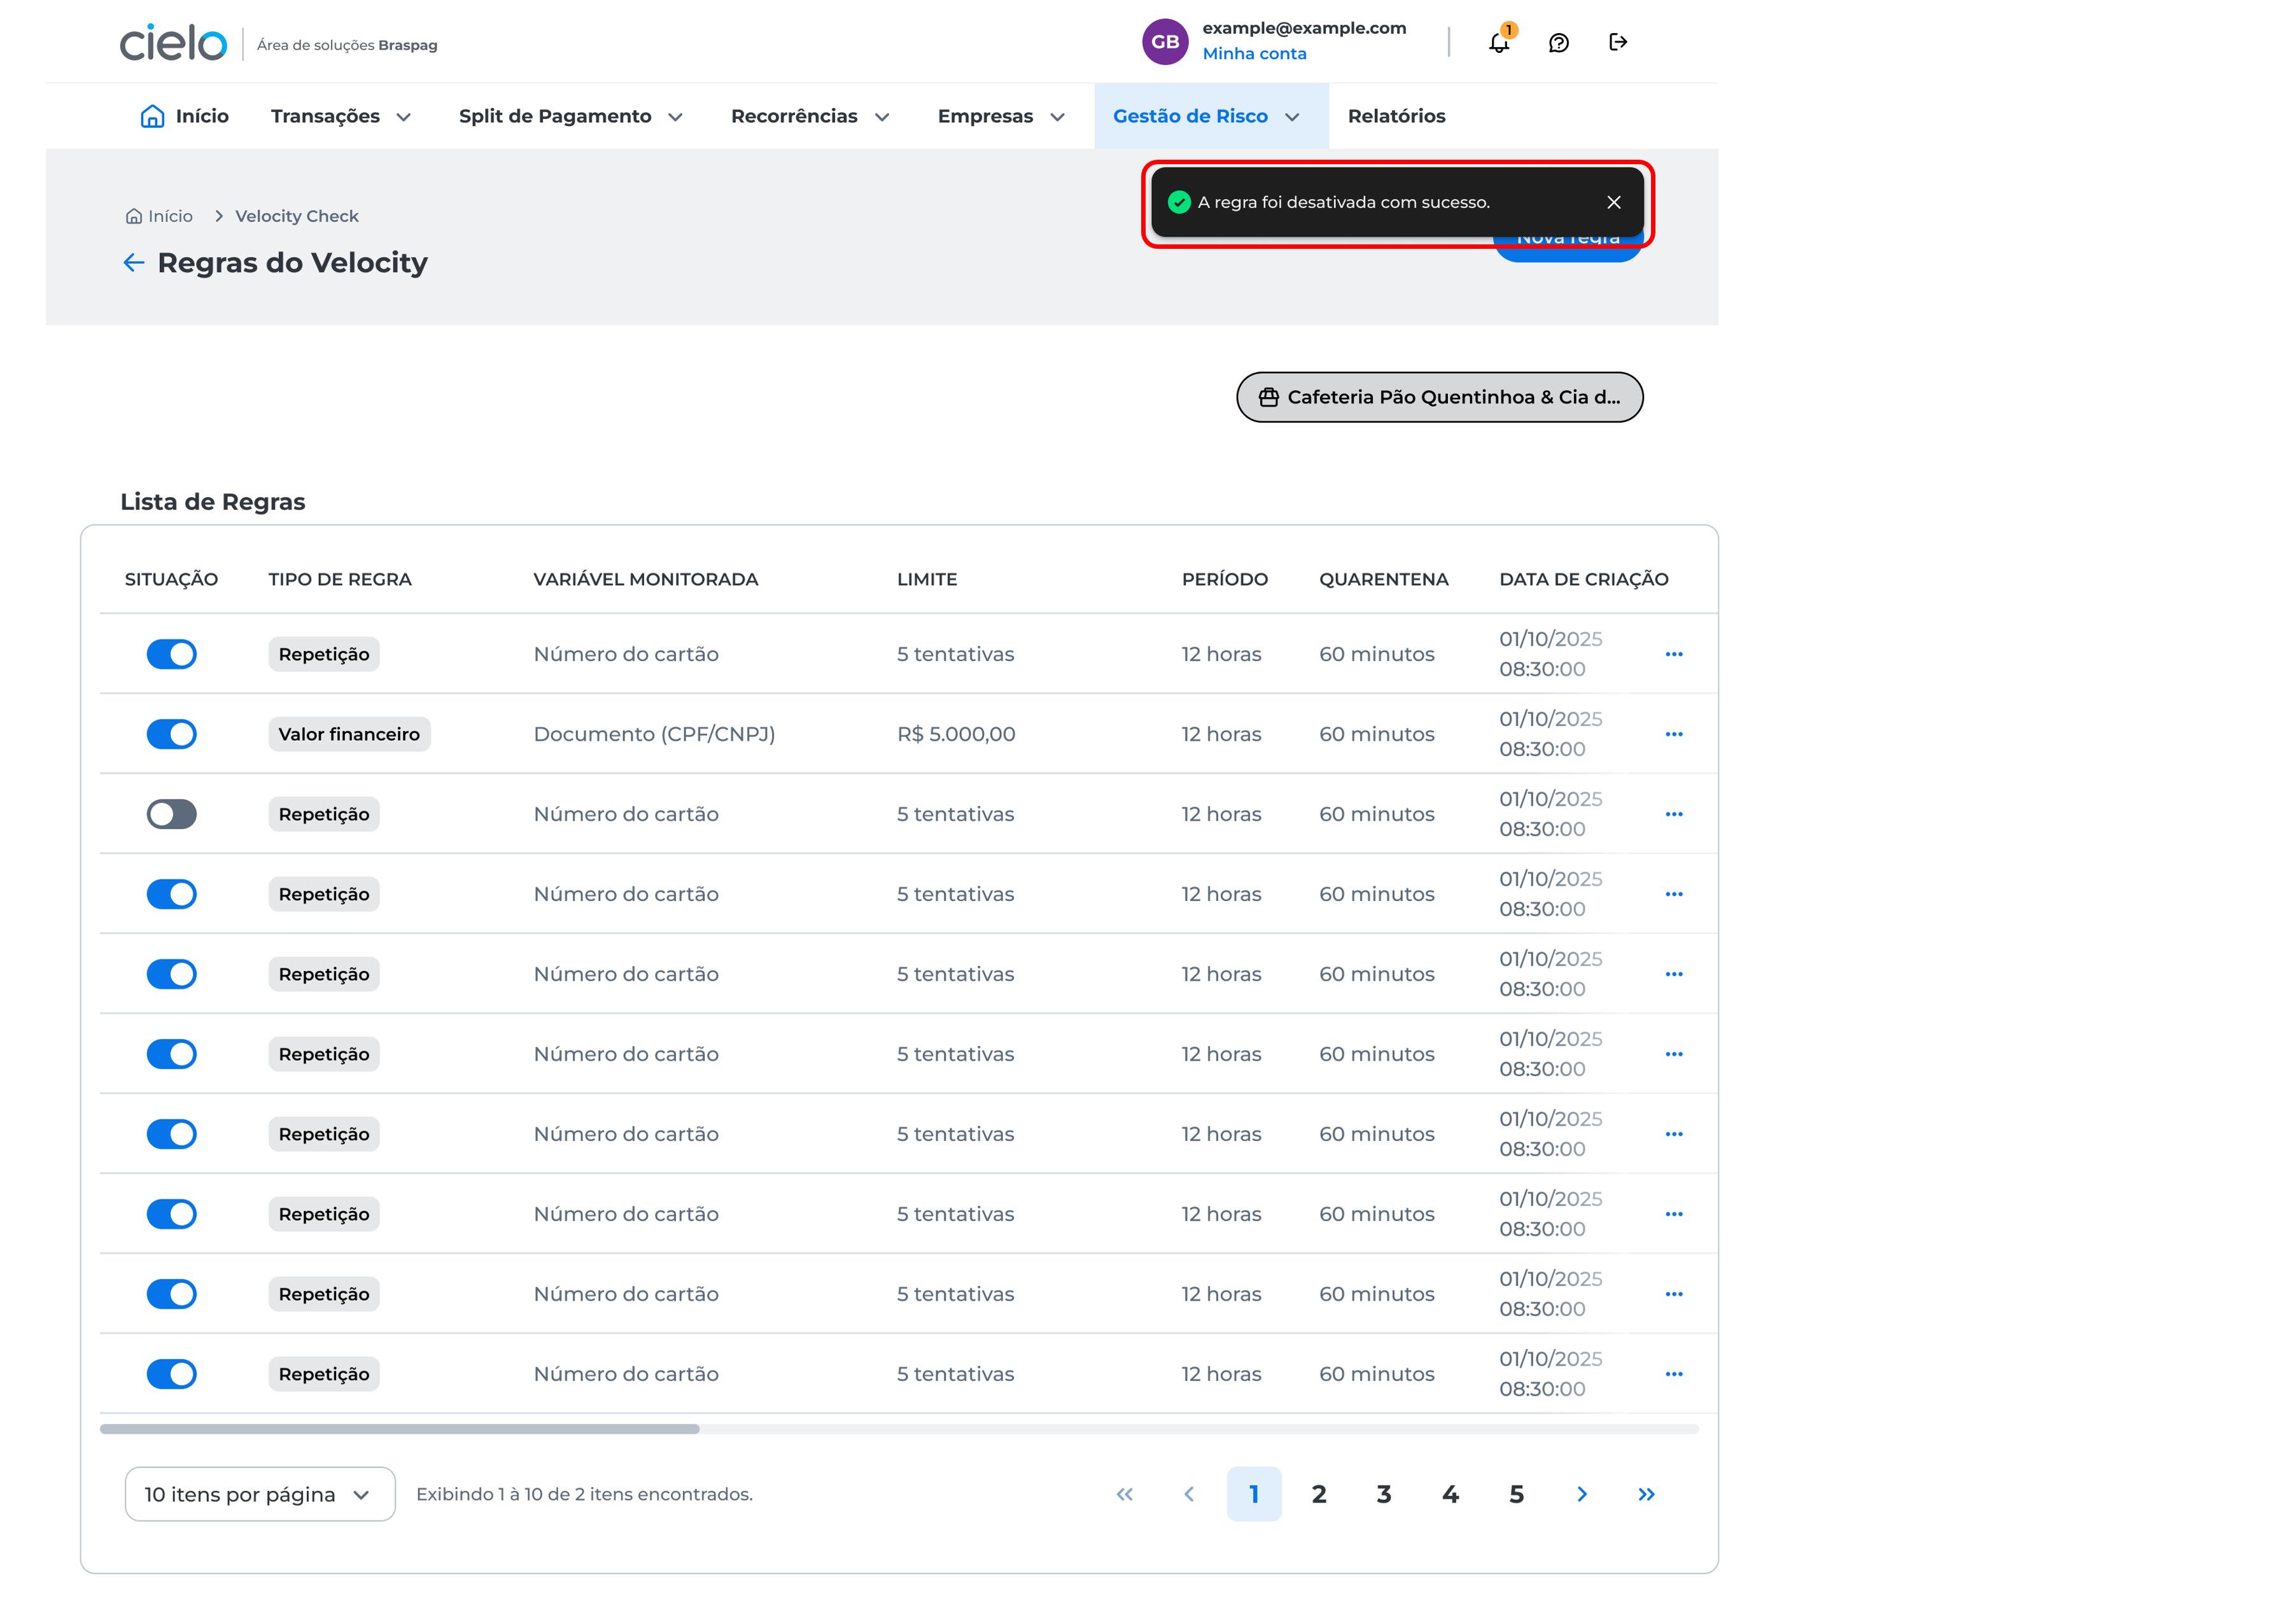
In the Situação column of the rules list, click the button to enable or disable a rule:
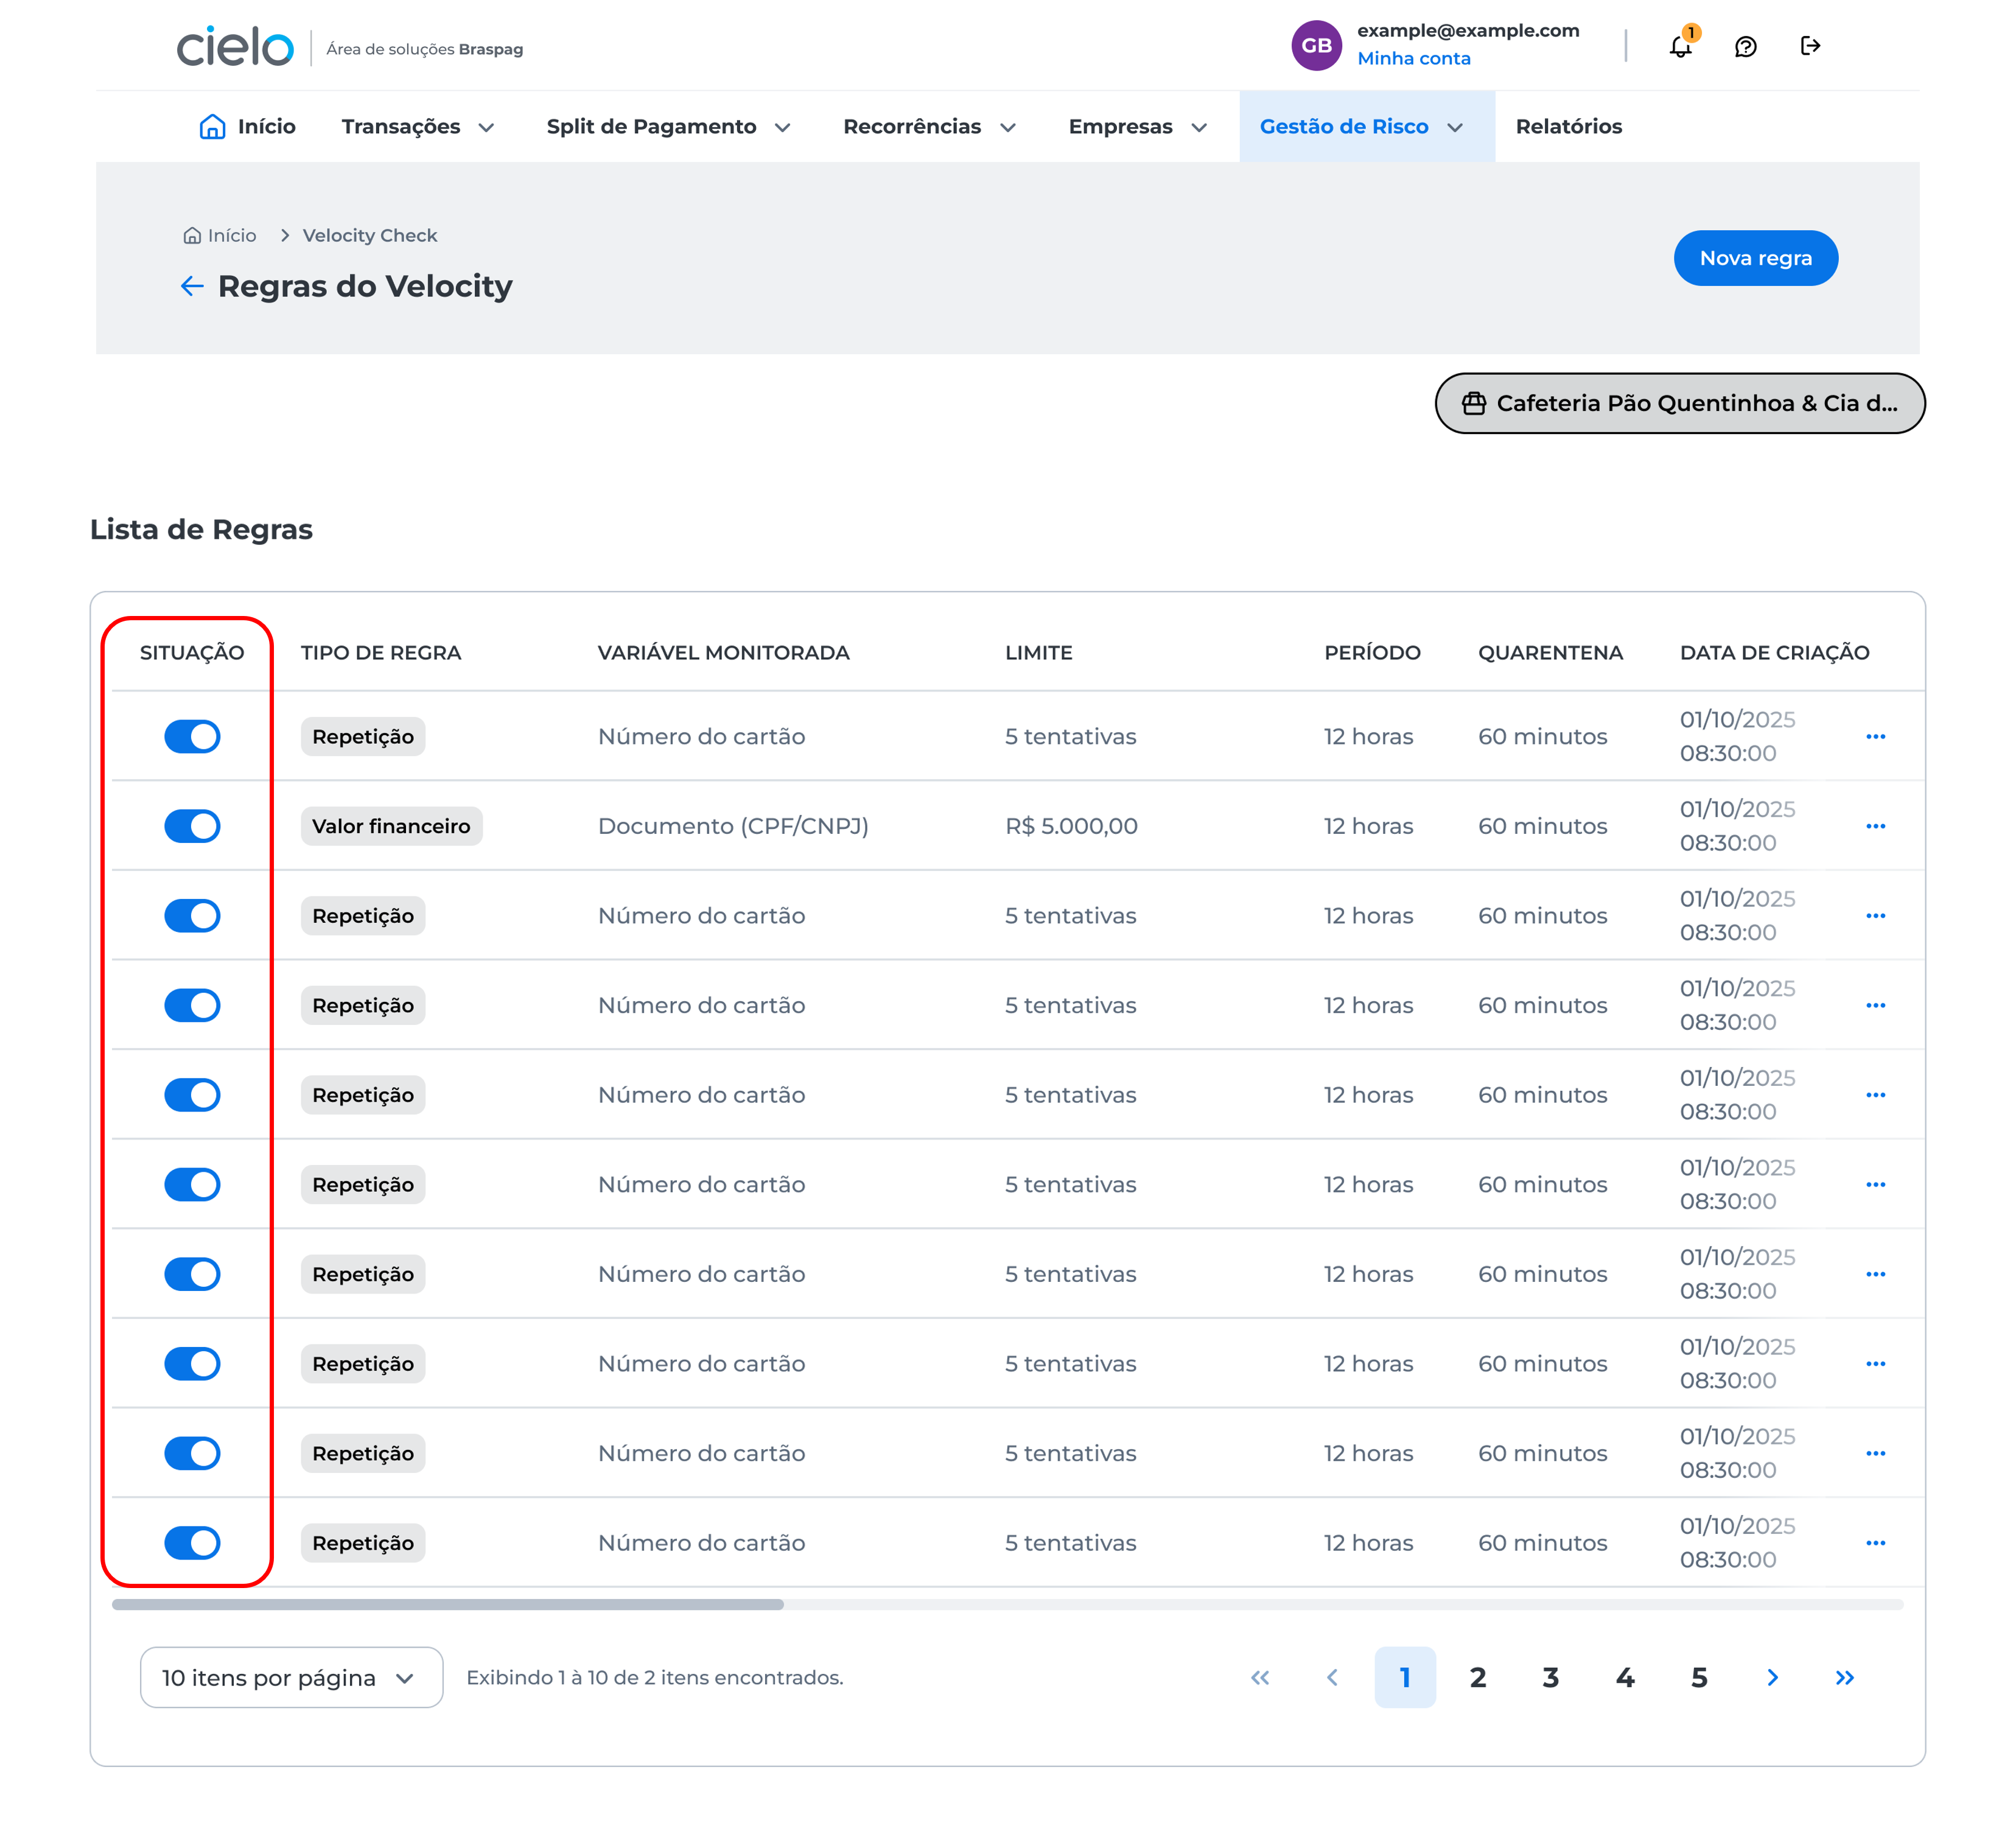
If the button is on the left, it will disable the rule; if it is on the right, it will enable the rule.
After enabling or disabling, a success message will be displayed:
Updated about 2 months ago