

Create payment link at Cielo website
The Link de Pagamento feature allows you to create, customize, and share charges quickly, without technical integration. With this feature, you generate a link to send to the client and track the payment directly through the Cielo website.
To use this feature, you must be a Link de Pagamento client.
To access the feature:
- Go to the Cielo Website;
- In the main menu, click E-commerce;
- Select Link de Pagamento;
- Click Gerar Link.
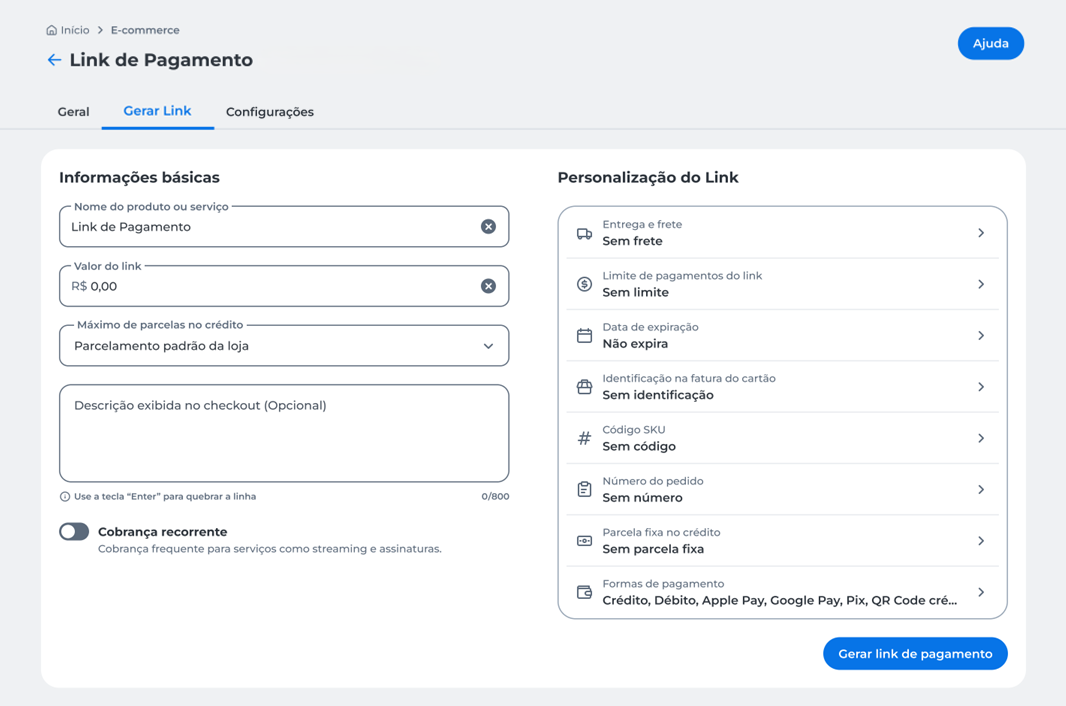
After accessing Gerar Link, the link creation page will be displayed with the following sections:
- Informações básicas: define the product or service, amount, and optional description;
- Personalização do link: configure shipping, expiration, payment methods, and identification;
- Cobrança recorrente: option to set up recurring payments.
Fill in Basic Information
In the Basic Information section, define the main details of the charge.
- Enter the product or service name that will be displayed to the client during payment;
- Fill in the link amount:
- The minimum amount is R$ 0.01;
- The maximum amount is R$ 20,000,000.00;
- Select the maximum number of credit card installments:
- Choose the number of installments available for the link;
- The options shown follow the configuration set by the merchant.
ImportantTo change the maximum number of installments available, go to Settings > Payment Methods.
Configure Link Customization
In the Personalização do link section, set up additional payment options such as shipping, expiration, identification, and payment methods.
Delivery and Shipping (entrega e frete)
Configure how the shipping cost will be applied:
- Enable the Entrega e frete option to include shipping in the link;
- Choose between:
- Frete grátis: no cost added to the payment;
- Frete fixo: set a fixed amount for shipping;
- If you select fixed shipping, provide:
- Shipping name;
- Shipping amount.
Payment Limit (limite de pagamentos)
Define how many times the link can be used:
- Enable the Limite de pagamentos do link option;
- Enter the maximum number of allowed payments.
Expiration Date (data de expiração)
Set how long the link will remain active:
- Enable the Data de expiração option;
- Select a date for the link to expire.
Card Statement Identification (identificação na fatura do cartão)
Define the text displayed on the client's card statement:
- Fill in the field with the name to be shown;
- Use a maximum of 13 characters;
- Do not use special characters.
SKU Code (código SKU)
Enter a product identifier:
- Fill in the field with the SKU code;
- Use this identifier for tracking.
Order Number (número do pedido)
Associate the link with an order:
- Enter the order number;
- Use an identifier to simplify reconciliation.
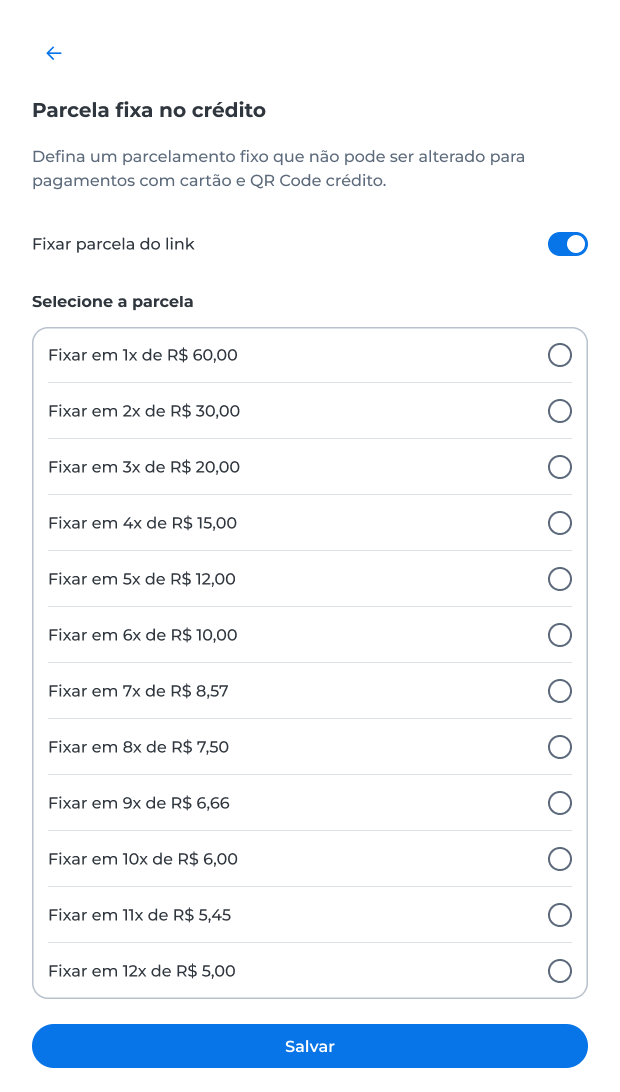
Fixed Credit Installment (parcela fixa no crédito)
Set a fixed payment condition:
- Enable the Parcela fixa no crédito option;
- Select the desired condition (e.g., 3x of R$ 20.00);
- The client will see only the defined option during checkout.
Payment Methods
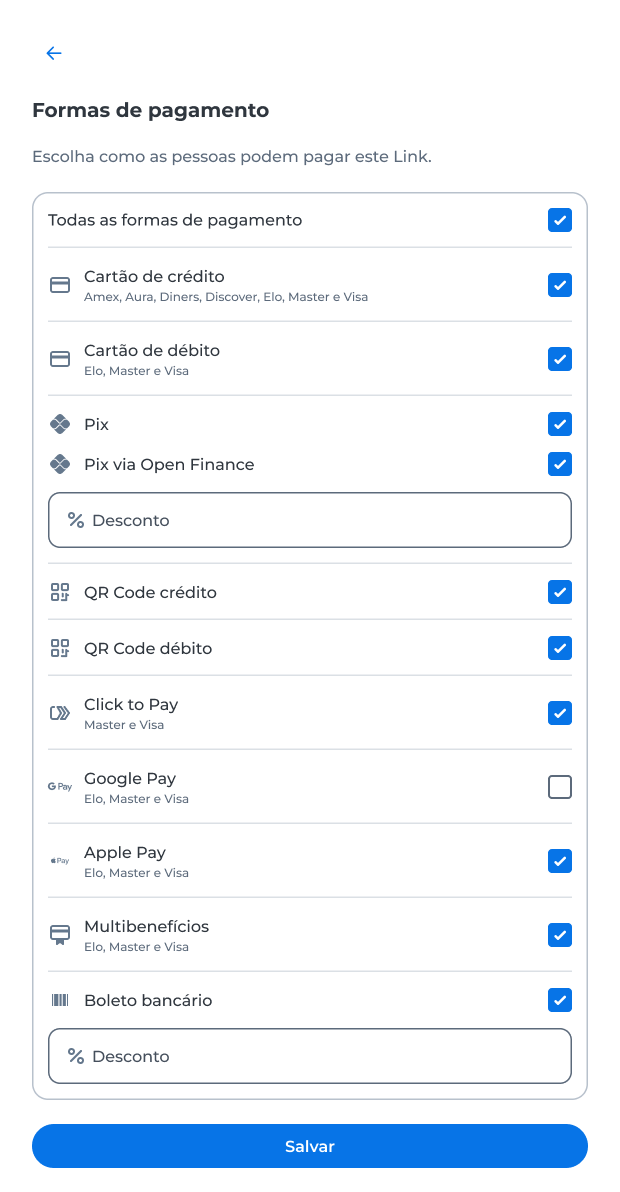
Choose which options will be available in the link:
- Select the desired methods (e.g., credit, debit, Pix, digital wallets).
- Set up discounts if needed.
ImportantTo configure the available payment methods, go to Settings -> Payment Methods.
Set Up Recurring Charge
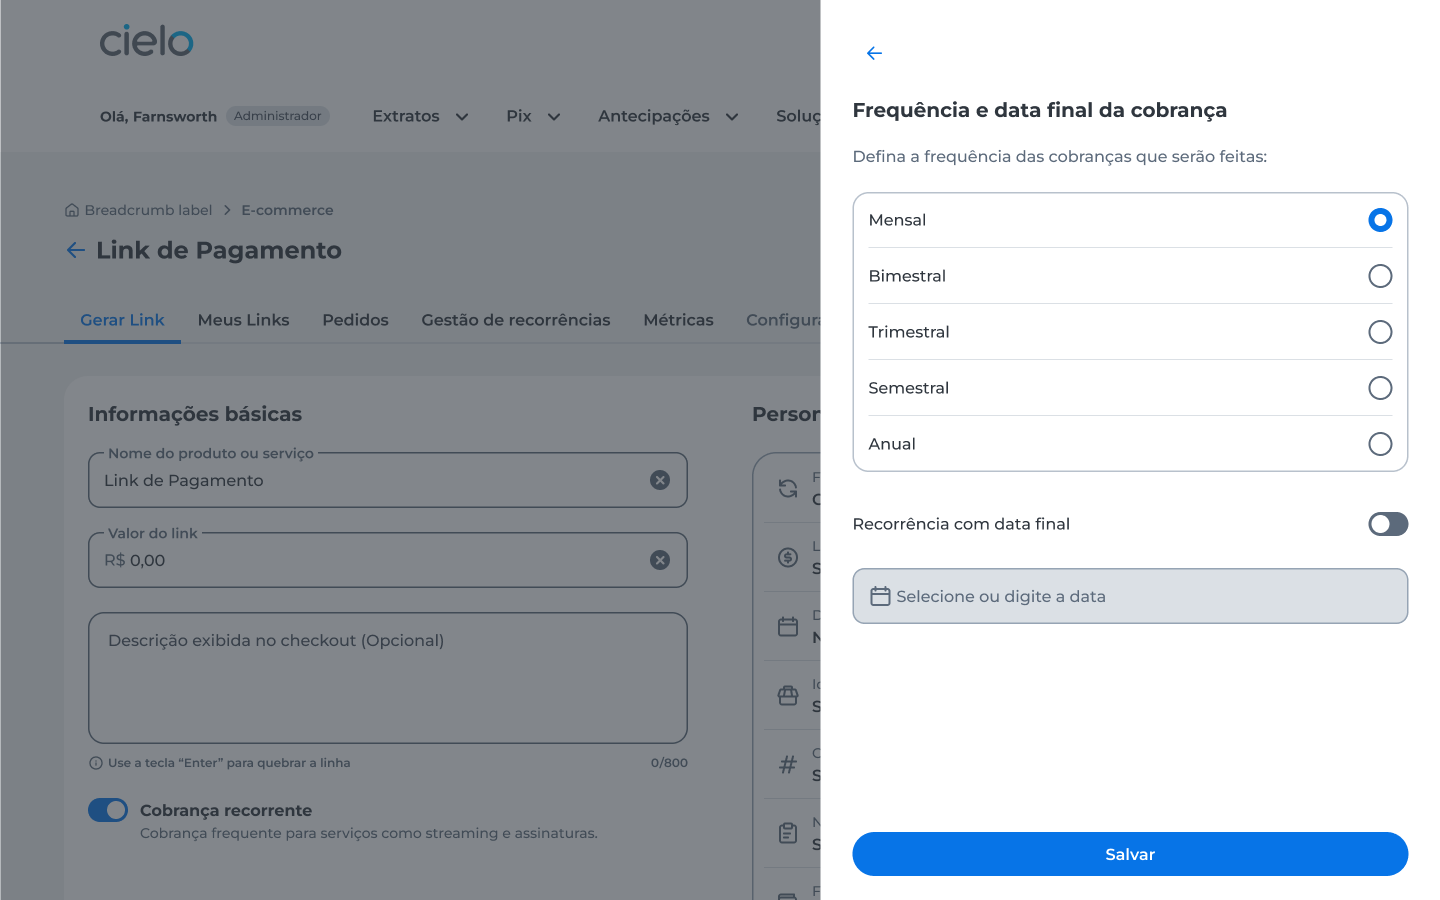
Enable the recurring charge option to create periodic charges, such as subscriptions or ongoing services.
To configure:
- Enable the Recurring charge option on the main screen;
- Select the charge frequency:
- Monthly;
- Bimonthly;
- Quarterly;
- Semiannual;
- Annual;
- (Optional) Set an end date for the recurrence:
- Enable the Recurrence with end date option;
- Select the end date for the charges;
- Click Save to apply the settings.
Important
- The charge will be processed automatically according to the selected frequency;
- If no end date is set, charges will continue until void;
- Use this option for recurring services, such as subscriptions and monthly payments.
Generate and Share the Link
After configuring all link details, complete the creation and share it with the client.
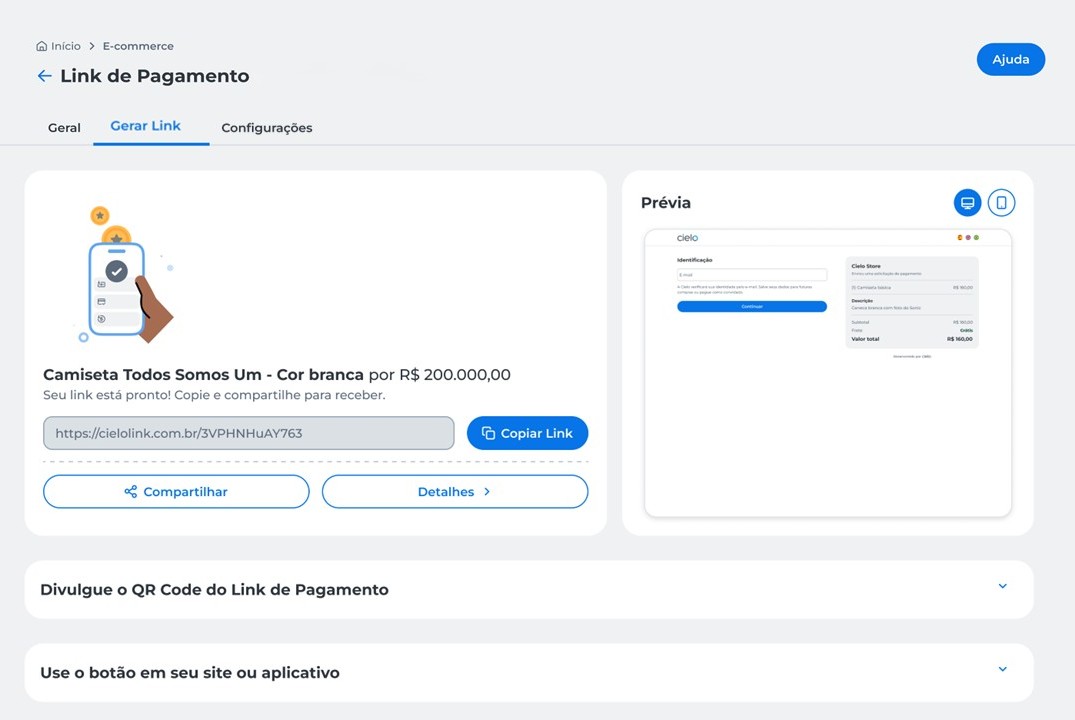
To generate the link:
- Click Generate payment link;
- Wait for the link to be created;
- Review the charge summary and the checkout preview.
Share the Link
After creating the link:
- Click Copy link to copy the URL and send it manually;
- Click Share to send it through your device's available channels.
Other Options
After generating the link, you can also:
- View link details;
- Share via the integrated system or browser share button;
- Use the link in channels such as email, WhatsApp, or social media.
Updated 18 days ago