

Pix
Pix allows you to receive payments instantly through Cielo channels.
To start receiving payments using this method, enable Pix on the Cielo Website.
You can use Pix Cielo or a type linked to a partner bank, such as Banco do Brasil or Bradesco.
WarningEven if multiple options are contracted, only one can remain active at a time. All transactions automatically use the active option at the moment of payment.
Next, see how to enable each option.
Enable Pix Cielo
To start receiving payments through Pix Cielo, follow the steps below.
Activate Pix Cielo
- Access your profile settings on the Cielo Website;
- Select Autorizações.
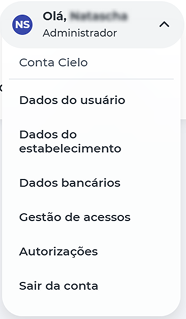
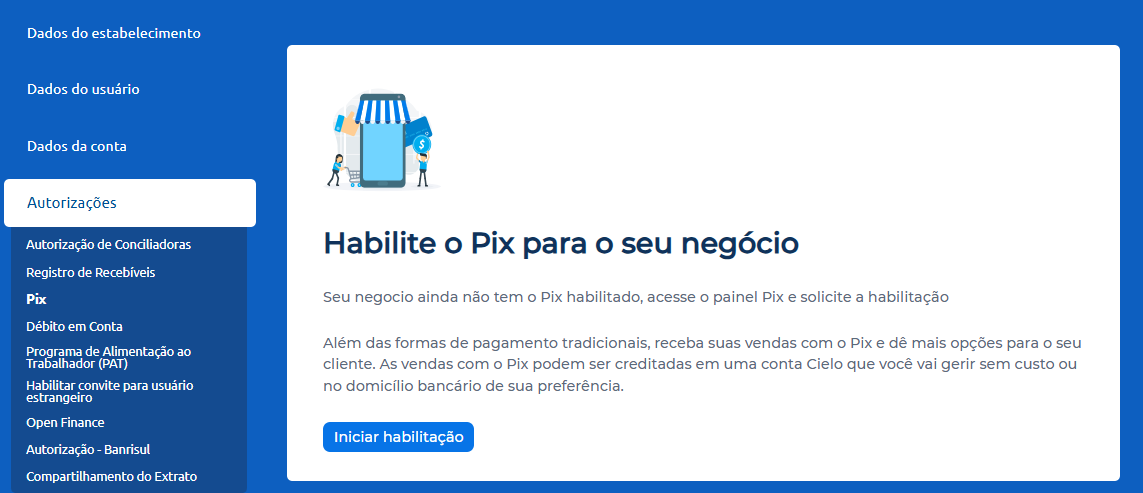
- Select Pix;
- Select Iniciar habilitação.
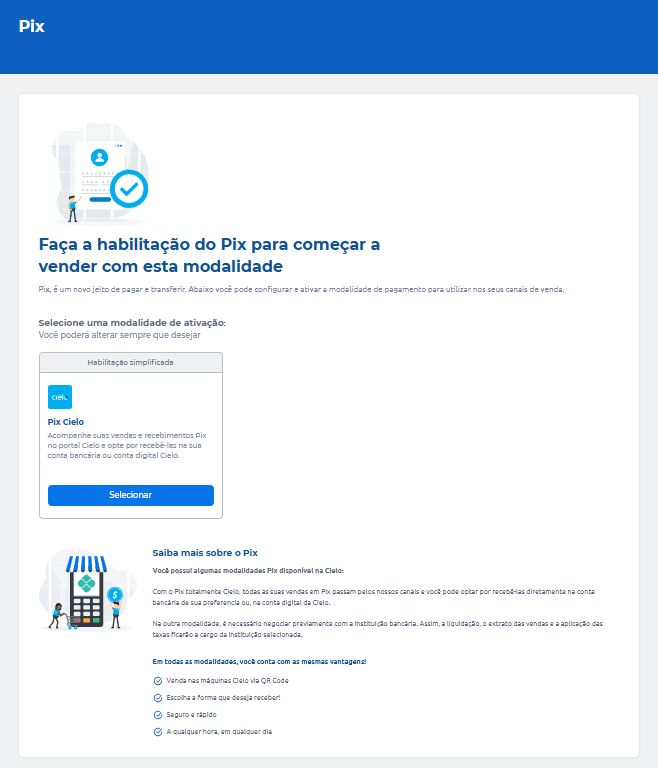
- Choose the Pix Cielo option and select Selecionar.
- Read the displayed contract and accept the Terms of Adhesion;
- Select Enviar.
After submission:
- You will see the message “Sua autorização do Pix foi enviada com sucesso”;
- The confirmation will be sent by email or SMS.
To check the activation status at any time, go to the top tab Pix → Configurações do Pix → Visão Geral.
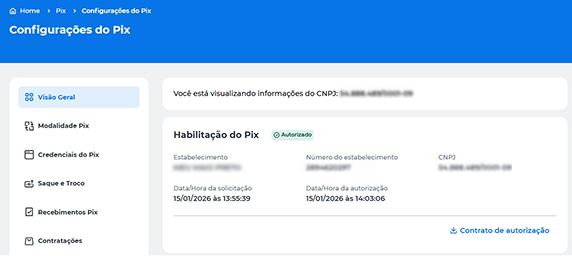
ImportantActivation is mandatory to process transactions with Pix. The selected option will apply to all merchants (ECs) under the same Tax ID (CNPJ).
Enable Pix Banco do Brasil or Pix Bradesco
It is possible to enable partner banks Bradesco or Banco do Brasil as Pix providers. The contracting and activation are done directly with the bank.
Follow the steps below to request activation of this option.
- Express interest at Banco do Brasil or Bradesco;
- Complete the activation process directly with the selected bank;
- Wait for the bank and Cielo to finish the required integration.
After the activation is completed:
- The option will already appear as active in the Pix Area. You do not need to authorize, select, or complete any additional steps on the Cielo Website;
- Sales are settled directly into the partner bank account;
- You can track transactions and payments through the partner bank’s channels.
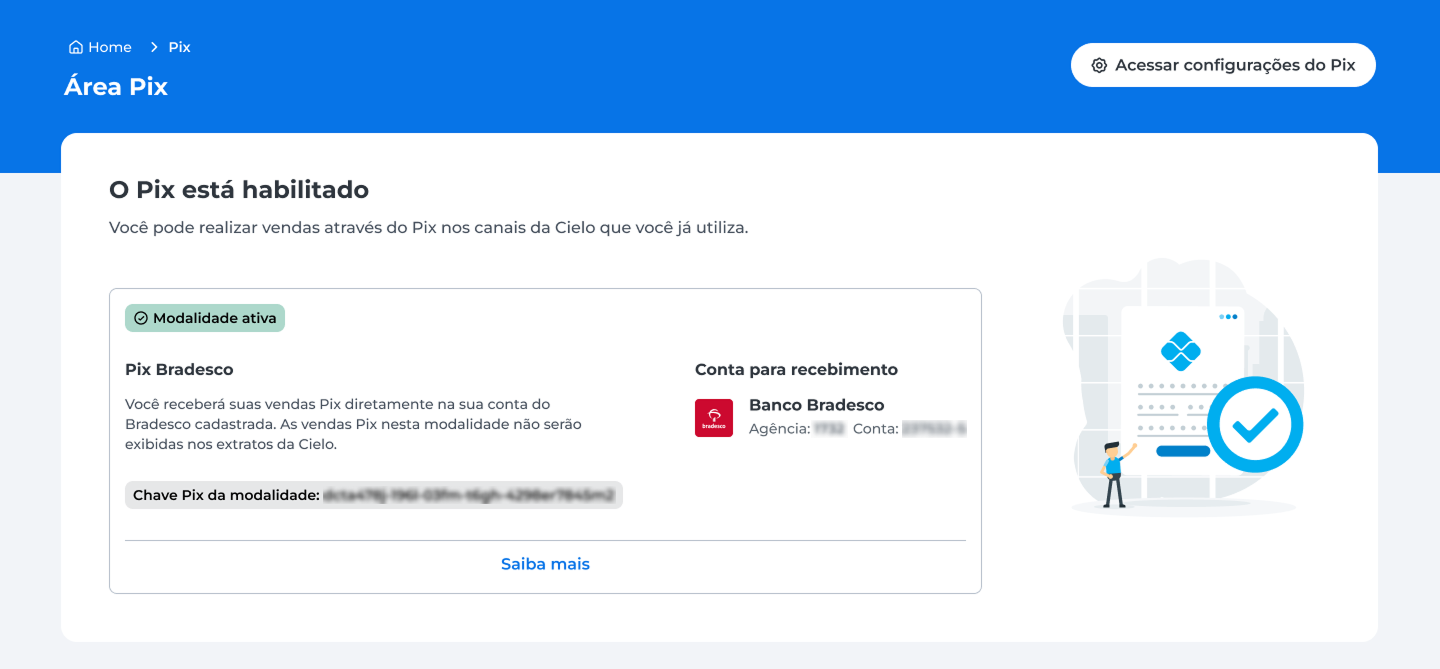
Switch Pix Option
If you have more than one Pix option enabled, you can change which one will be used to process your merchant's transactions.
Follow the steps below to change the active option.
-
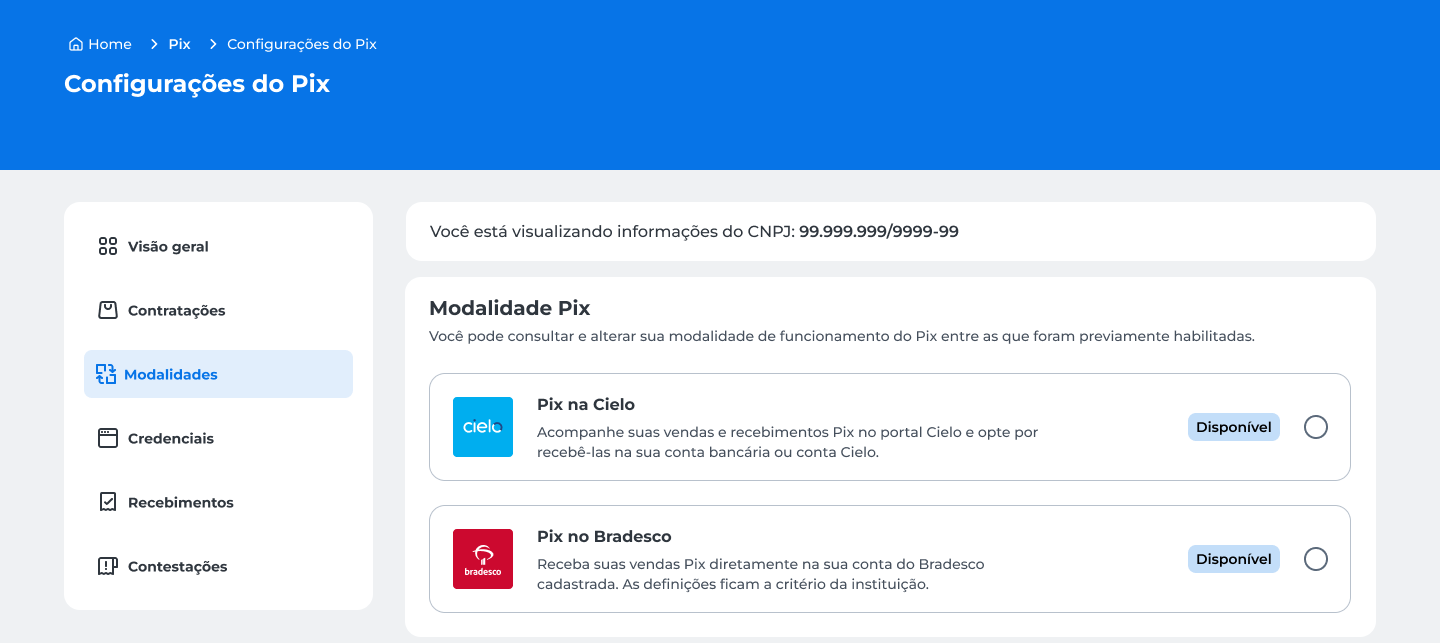
Go to Pix → Configurações do Pix → Modalidades.
-
Select the desired option among the ones you have already enabled;
-
Review what changes when activating the option.
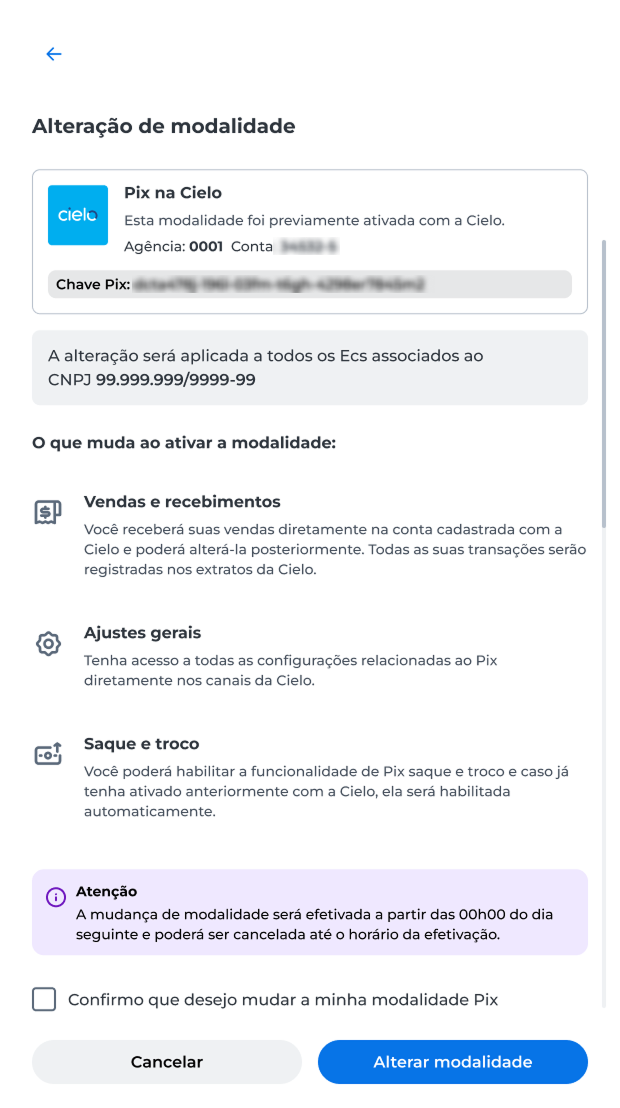
- Check the option Confirmo que desejo mudar minha modalidade Pix;
- Select Alterar modalidade;
- Complete the operation authentication through the Cielo Gestão app.
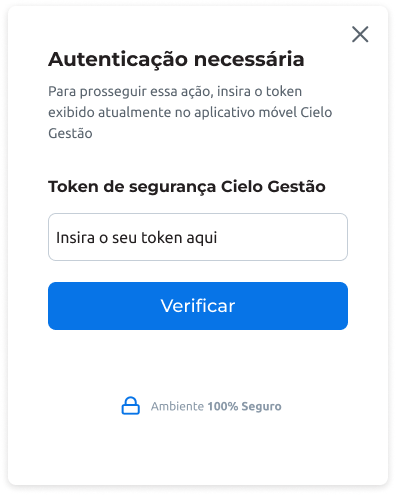
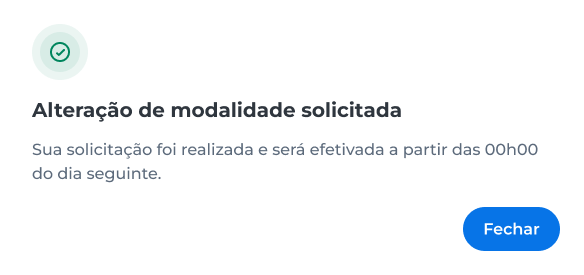
The system displays the message "Alteração de modalidade solicitada".
The new option becomes active starting at 00:00 (Brasília time) on the next day.
Warning
Only one Pix option can remain active at a time for the entire Tax ID (CNPJ);
The switch takes effect starting at 00:00 (Brasília time) the next day. Until then, transactions will continue using the previous option;
While the request status is In progress, you can select Cancel request.
Request History
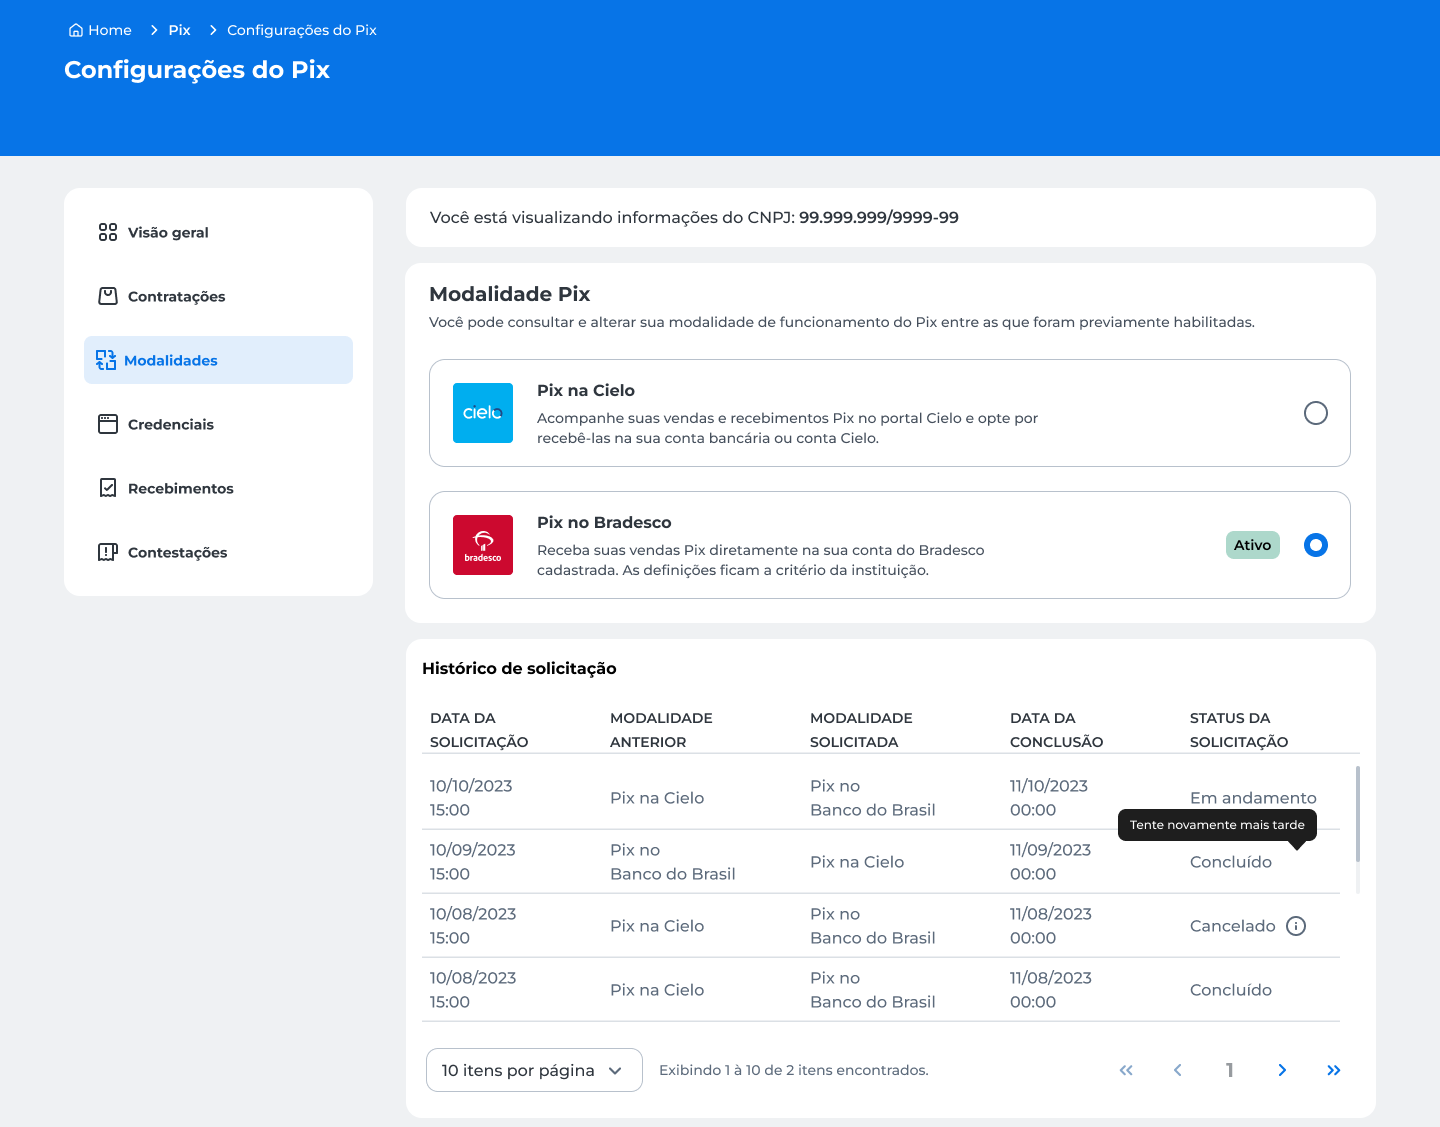
On the Modalidades screen, you can view the history of Pix option change requests.
The history displays information such as the request date, the previous option, the requested option, the expected completion date, and the request status.
Pix Transaction Identifier (E2EID)
- Pix transactions have a code called
end_to_end_id(E2EID), which is a unique identifier for each transaction in the Pix payment system. This code is automatically generated by the Central Bank of Brazil (BCB) and is usually present on the bank's payment receipt;- In the Checkout and Link de Pagamento, this code is present on the Cielo portal within the order details (with the name "Transaction ID") and in the status change notifications via API (it has nomenclatures, as seen in the notifications' table of contents).
Updated 26 days ago