

Query orders in the Cielo Gestão app
Query and manage the orders generated by your payment links in the Cielo Gestão app.
How to access
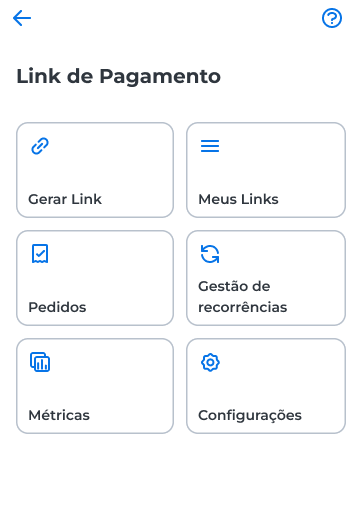
- Open the Cielo Gestão app;
- Select Link de Pagamento;
- Select Pedidos (Orders).
Query orders
When the page opens, you can switch between the Pedidos avulsos (One-time orders) and Pedidos recorrentes (Recurring orders) tabs.
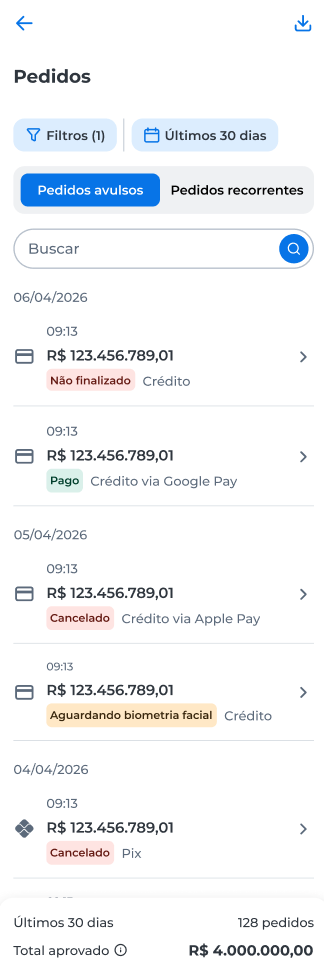
Each tab shows a different type of charge:
- Pedidos avulsos, to query one-time charges;
- Pedidos recorrentes, to query charges linked to recurring payments.
The default periods displayed in each tab are:
- Pedidos avulsos: last 30 days;
- Pedidos recorrentes: last 6 months.
The indicators on the page also consider the period displayed in each view.
Export a report
You can export the data in the list for external analysis.
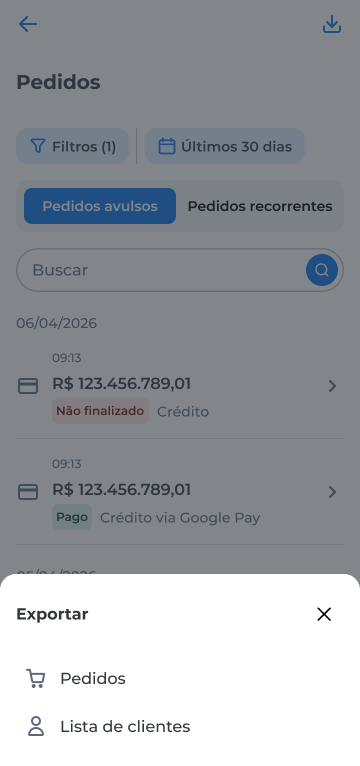
- On the Pedidos page, click Exportar (Export);
- Select one of the available options:
- Pedidos, to export the list of orders;
- Lista de clientes (Client list), to export the complete list of clients;
- Wait for the export to finish.
When the process is complete, the app displays a success message.
ImportantThe Pedidos export considers the filters and the period selected in the query.
The Lista de clientes export generates the complete list of clients, regardless of the filters applied.
Query the details of an order
To access the information of an order:
- On the Pedidos page, select the order you want.
The app displays the order details screen.

The page gathers the main information about the transaction.
On the details screen, you can query:
- The transaction information;
- The client data;
- The payment method;
- The payment data;
- The product or service information;
- The result of the antifraud analysis.
Depending on the transaction status, the app can also display additional information, such as facial authentication or antifraud analysis alerts.
Some information and actions may vary according to the transaction status.
Query the facial authentication (ID Pay)
For transactions that went through facial biometrics, a notice at the top of the details explains the authentication. Select Entenda o que é biometria facial (Learn what facial biometrics is) to see how it works.
In the Autenticação facial (Facial authentication) section, query the Status da autenticação facial (Facial authentication status) and copy the Link para autenticação facial (Facial authentication link) by using the copy icon.
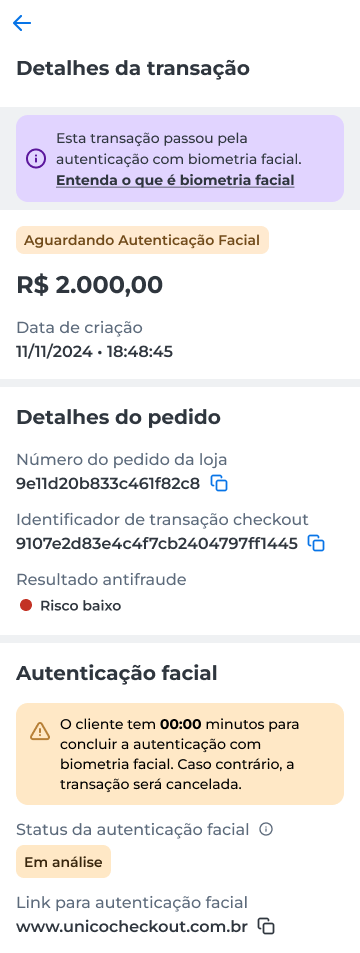
In the Autenticação facial section, you can:
- Query the facial authentication status;
- Copy the facial authentication link to share it again with the shopper;
- Query authentication-related alerts, when available.
WarningIf the authentication is not completed within the period displayed in the notice, the transaction is voided.
Resend notifications
On the order details page, you can resend notifications related to the transaction.
The following options are available:
- Reenviar post de notificação (Resend notification post), to resend notifications about transaction status changes or the creation of recurring orders;
- Reenviar notificação de mudança de status (Resend status change notification), to resend the latest transaction status update.
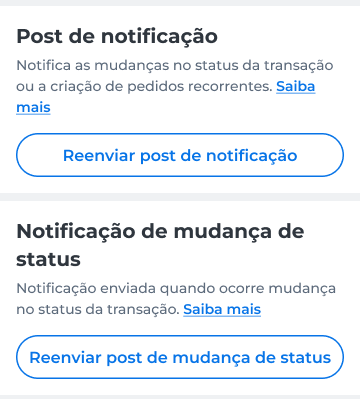
After you resend the notification, the app displays a success message.
Add a comment
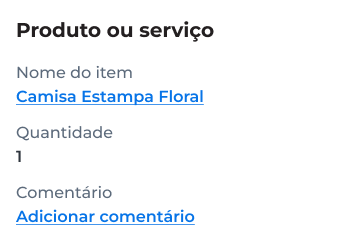
- Under Produto ou serviço (Product or service), select Adicionar comentário (Add comment);
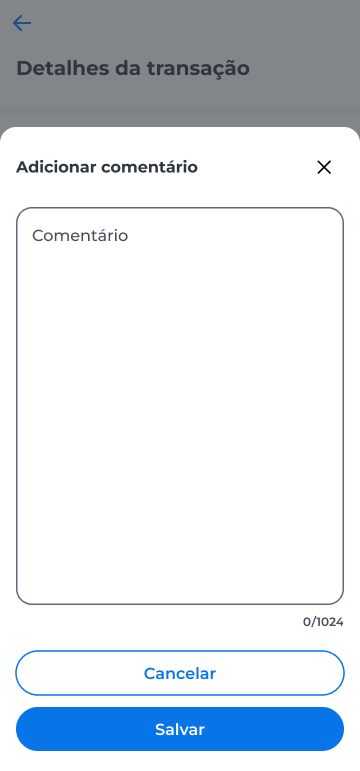
- Enter the text in the Comentário (Comment) field;
- Select Salvar (Save).
To leave without saving, select Cancelar (Cancel). After you save, the app displays the message Pronto! Comentário adicionado. (Done! Comment added.)
To change or remove an existing comment, use the Editar (Edit) or Excluir (Delete) options displayed next to the comment.
Query recurrence information
Recurrence information is available only for recurring orders.
Query the recurrence details
To query the recurrence information:
- On the Pedidos page, click the Pedidos recorrentes tab;
- Select the order you want.
In the Detalhes do pedido (Order details) section, you can query the following recurrence information:
- The recurrence identifier;
- The result of the antifraud analysis;
- The recurrence status.
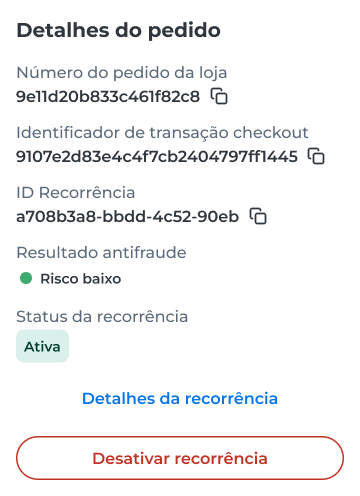
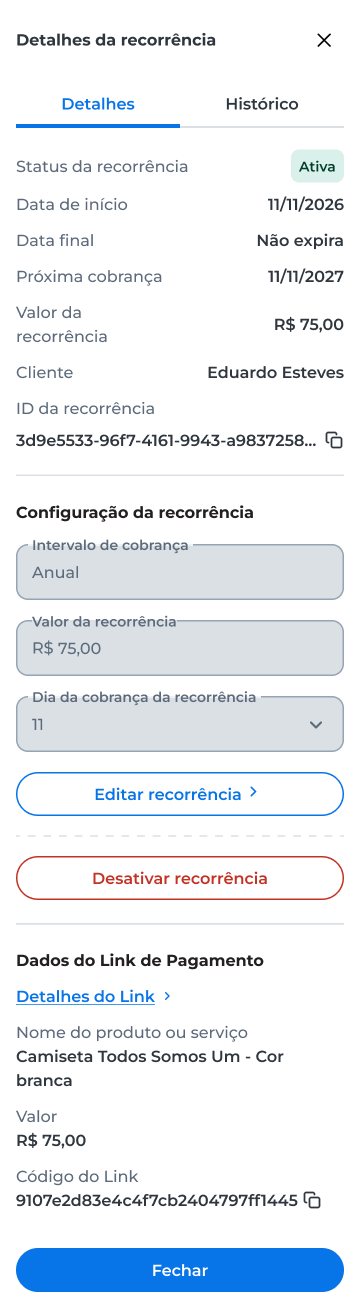
To see more information, click Detalhes da recorrência (Recurrence details).
Edit a recurrence
In the Detalhes da recorrência panel, click Editar recorrência (Edit recurrence).
You can change:
- The billing interval;
- The recurrence amount;
- The billing day.
After you make the changes, click Salvar alterações (Save changes).
Deactivate a recurrence
In the Detalhes da recorrência panel, click Desativar recorrência (Deactivate recurrence).
Read the information displayed and click Desativar (Deactivate) to confirm the operation.
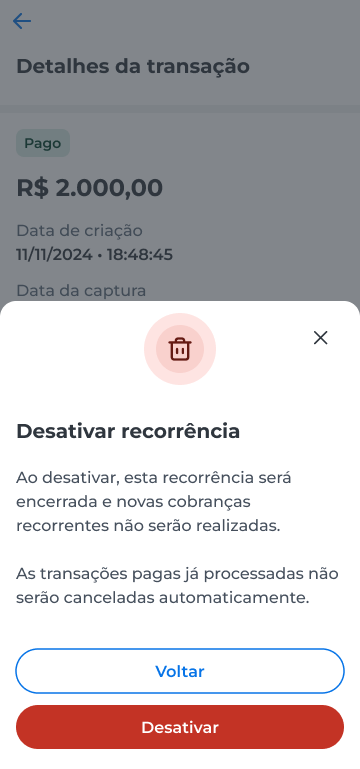
After you confirm, the app displays a success message and the next automatic charges are stopped.
WarningDeactivating a recurrence ends it and prevents new recurring charges. Paid transactions that were already processed are not voided automatically.
To capture or void a transaction, see Capture and cancel transactions.
Updated 16 days ago