Click to Pay
Click to Pay is a system regulated by the international standard Secure Remote Commerce EMVco® that allows one-click purchase.
Before using Click to Pay, the shopper (cardholder) needs to register in the Click to Pay system.
Payment journey
Below is an example of what the Click to Pay (C2P) payment screens look like in your shopper’s mobile payment journey, in a successful scenario (payment approved).
- The shopper chooses to pay with Click to Pay:
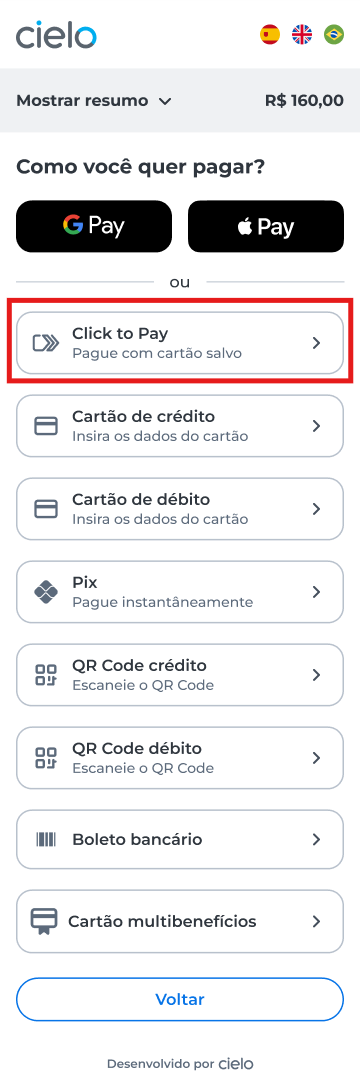
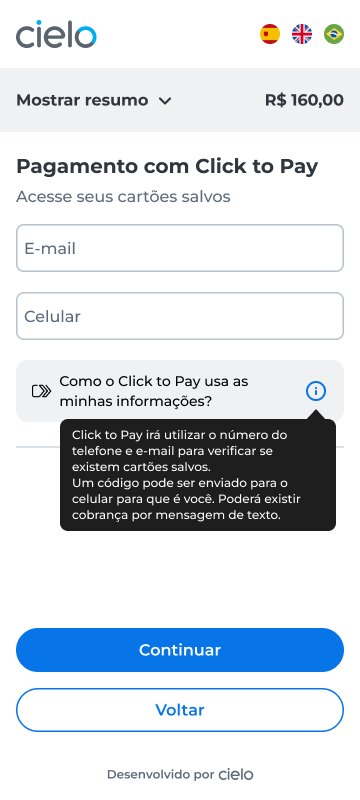
- Shopper identification
The way the shopper is identified depends on the scenario:
- New user: the way the shopper is identified depends on the scenario:
- Unrecognized device: the shopper will be identified by email or phone and will need to undergo verification via OTP;
- Recognized device: the shopper is automatically identified by the browser or device.
Important:OTP (one-time password) verification is only required when the device is not recognized.
- Access to stored cards
After identification, the shopper accesses the stored cards and chooses the preferred card to complete the payment or add a new card.
- New user: will fill in the card details and accept the Opt Ins required for registration;
- Already registered user: will see saved cards and can select one of them.
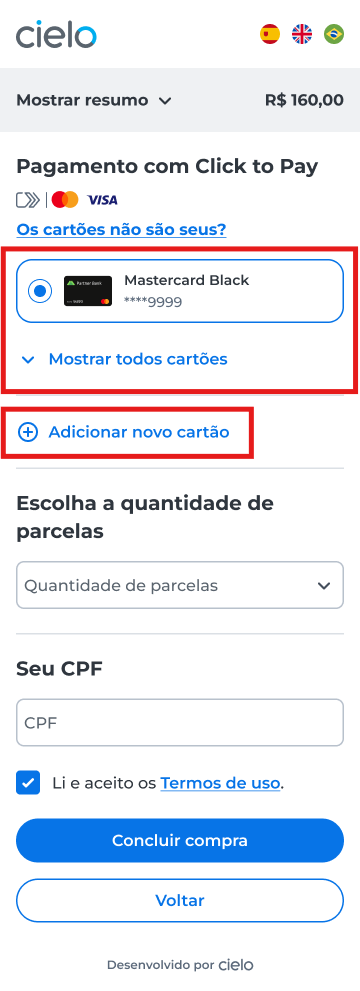
- After selecting the card and entering the required details (if applicable), Click to Pay processes the transaction. For new shoppers, this step also includes registration with C2P and acceptance of Opt-Ins.

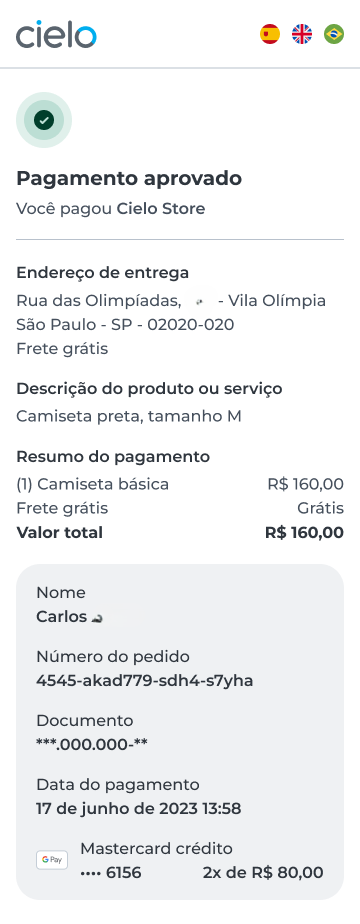
- After payment confirmation, the order completion screen is displayed with the message Payment approved.
Updated 6 months ago